
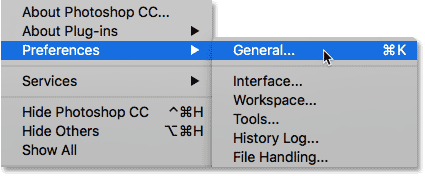
As you mentioned, Photoshop preferences are divided into different categories. Let's start with the general category. To access Preferences, on a Windows PC
go to menu” Release in the menu bar along the top of the screen. From there, choose Preferences down near the bottom of the list
Then choose General . On a Mac (which is what I'm using here), go to Menu Photoshop in the menu bar. Choose Preferences , then choose General :
How to access Photoshop preferences
Preferences dialog
This opens the Photoshop Preferences screen. The categories we can choose from are listed in the column along the left. The currently selected category options appear in the main area in the center.
At the moment, the category is selected the public . Note that in Photoshop CC, Adobe has added several new categories to Preferences
Such as workspace, tools, and history history. While the categories themselves are only available in Photoshop CC
Most of the options within these new classes can be found in other classes in CS6:
Read also:How to enlarge and reduce an image using Photoshop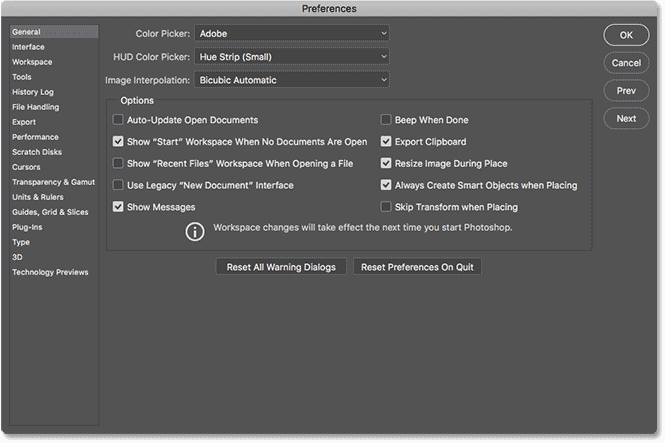
How to access Photoshop preferences
General preferences
Clipboard export
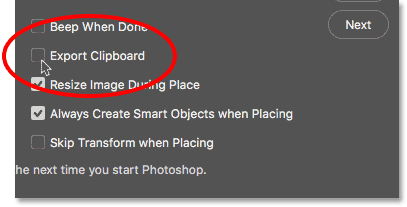
The first option we'll look at, found in General preferences, is Clipboard export . This option can affect the overall performance of your computer.
When we copy and paste images or layers in Photoshop, the copied items are placed on the Photoshop clipboard.
و Holster It is part of the computer's memory (RAM) and this is a violation of Photoshop's use. The computer's operating system also has its own clipboard (its own memory section).
When Clipboard Export is enabled, any items stored in Photoshop's clipboard are also exported to your operating system's clipboard.
This allows you to paste copied items into a different application, such as Adobe Illustrator or InDesign. But Photoshop file sizes can be Huge .
Exporting huge files to your operating system's memory can lead to errors and performance issues.
By default, Clipboard Export is enabled (checked). To help keep your computer running smoothly
Disable (uncheck) this option. If you need to transfer files from Photoshop to another application
Read also:Basic navigation shortcuts for images in photoshopIt is best to just save the file in Photoshop. Then open the file saved in the other program:
How to access Photoshop preferences
interface preferences
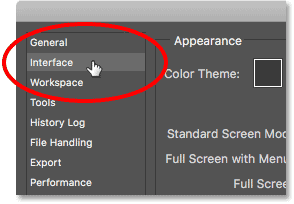
Next, let's look at some of the options that allow us to customize the Photoshop interface. Click a category Interface on the left:
How to access Photoshop preferences
color appearance
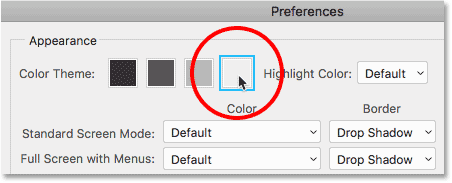
The first option we'll look at is color theme . This option controls the overall color of the Photoshop interface. In this case
“Color” means different shades of grey. Adobe gives us four different color themes to choose from.
Each format is represented by a carrier. The default color theme is the second swatch from the left:

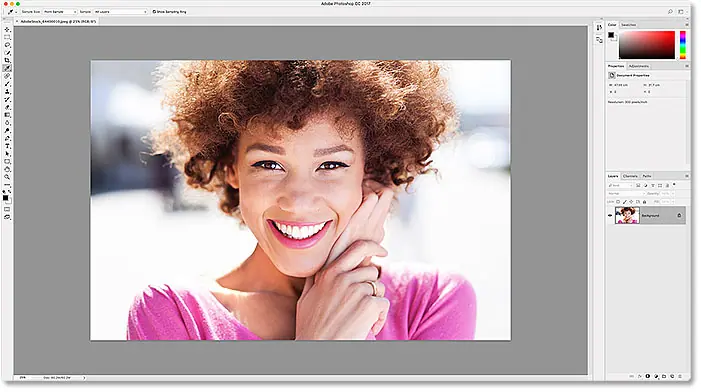
Adobe started using this dark theme in Photoshop CS6.
Photoshop CC also uses this dark theme by default. Before CS6, the interface was much lighter (image from Adobe Stock )

To choose a different color theme, click on its swatch. There is one theme that is darker than the default and two that are lighter.
I will choose the lightest of the four subjects. Note that the theme also controls the color of the Photoshop dialogs:
And here we see that the Photoshop interface is now much lighter. Adobe's idea behind the dark theme was that it be less intrusive
Which allows us to focus more easily on our photos. Personally, I agree
Which is why I stick to the default theme. But some people prefer the lighter interface.
Choose the look that suits you. You can change the Photoshop color theme in the Preferences at any time:
Color highlighting (Photoshop CC)
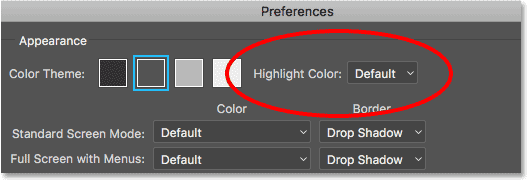
In Photoshop CC, Adobe has added an option Highlight Color new to Interface preferences.
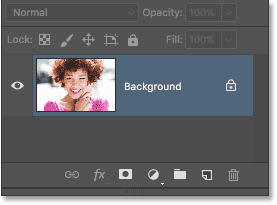
This option is not available in CS6. “Highlight Color” refers to the color Photoshop uses to highlight the currently selected layer in the Layers panel:
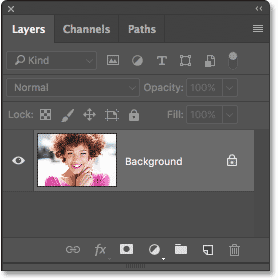
By default, the highlight color is a shade of gray that matches the general color theme.
Here we see Layers panel in Photoshop with highlight background layer In default gray. We will learn all about classes in the section Photoshop layers :
Another accent color we can choose is blue:
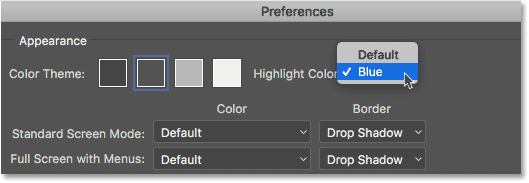
Now, we see that my background layer is highlighted in blue. I prefer the default gray because again it's less intrusive.
Like the color theme, you can change the highlight color, along with any of your Photoshop preferences, at any time:
How to access Photoshop preferences
User interface font size
Another option worth looking at in Interface preferences is UI Font Size .
This option is available in both CC and CS6. “UI Font Size” controls the size of text in the Photoshop interface (“UI” stands for “User Interface”). Adobe sets the default font size to صغير :
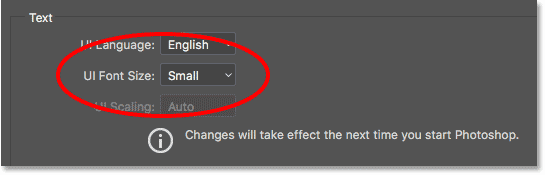
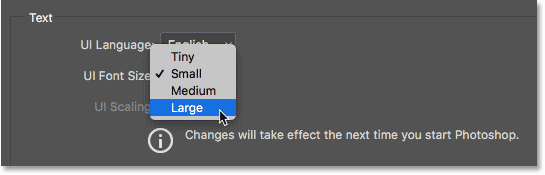
If you have trouble reading lowercase letters, you can increase the size. To capitalize the text, choose either متوسط Or Big .
There is also a choice صغير If you hate your eyes and want to suffer. Personally, I set the UI Font Size to Large to help reduce eye strain during long hours at the computer:
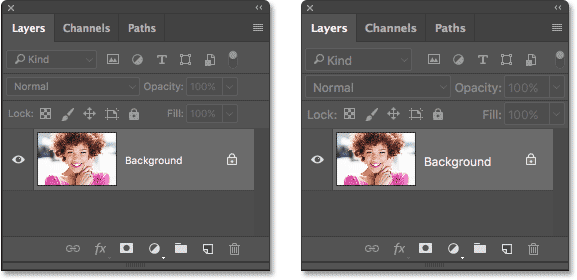
You will need to close and restart Photoshop for the change to take effect. For comparison, let's look again at my Layers panel. on the left
We see the Layers panel using the default text size (small). On the right is the same panel after resizing to large (and restarting Photoshop):
Tools Preferences (Photoshop CC)
Next, if you're using Photoshop CC, click on a category Tools on the left to open Photoshop tool-related preferences.
The Tools category is new in Photoshop CC. CS6 users should still be in the Interface class for now:
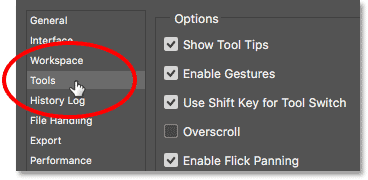
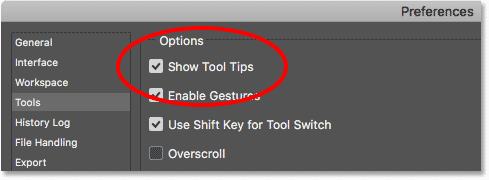
Show hints
The first option to look at in Tools preferences is Show tool tips (In CS6, "Show tooltips" is in the Interface class).
A tooltip” is a helpful message that pops up when you hover your mouse pointer over a tool or option in Photoshop. Tooltips provide a brief description of what the tool or option is used for:
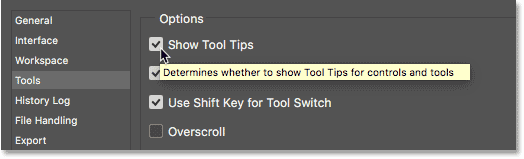
For example, if you hover your mouse over the Show Tooltips option
A yellow tooltip will appear indicating that this option determines whether you want to show Tooltips:
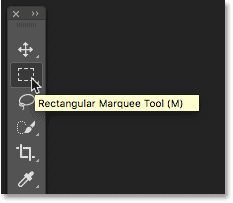
Here, we see that when I hover the cursor over a tool icon in Toolbar Photoshop
The tooltip lets me know which tool to choose:
Tooltips are enabled by default. If you're new to Photoshop, it's a great way to help you learn. But once you know your way around Photoshop
Tooltips can start to get in the way. When you feel you no longer need it, simply uncheck Show Tooltips in the Preferences.
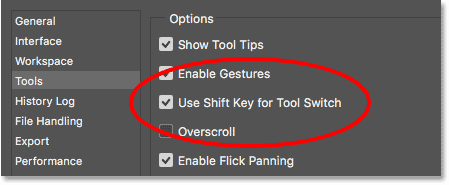
Use the Shift key for the tool key
Another option in the Tools category in Photoshop CC is Use Shift Key for Tool Switch . in Photoshop CS6
You will find it in General Preferences. This option affects how we select Photoshop tools when using keyboard shortcuts. default
“Use Shift Key for Tool Switch” is enabled (checked):
All Photoshop tools are located in Toolbar to the left of the interface. Adobe groups related tools together to save space.
If you click, hold on lasso tool , for example, the list of move clouds show me that Polygonal Lasso Tool و Magnetic lasso tool Also available at that same spot.
Note that all three tools share the same keyboard shortcut (the letter “L”).
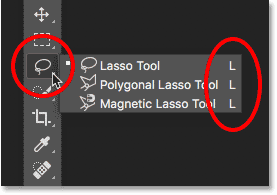
With "Use Shift Key for Tool Switch" enabled, pressing "L" on your keyboard will select the Lasso tool. But no matter how many times you press "L"
you will choose فقط Lasso Tool. To cycle through the Polygonal Tool or the Magnetic Lasso, you need to press and hold Shift key And pressing "L".
This is true for any tools in the toolbar that share the same keyboard shortcut. To save time and avoid having to press and hold the Shift key
Uncheck the “Use Shift Key for Tool Switch” option.
With the option turned off, you can cycle through all the tools that share the same keyboard shortcut by simply pressing the same letter.
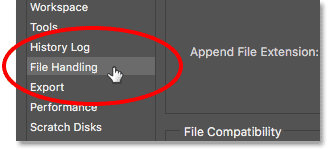
File processing preferences
Next, let's move on to the File Handling preferences. Choose a category File processing on the left:
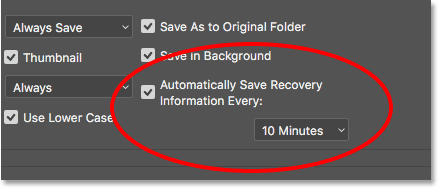
Autosave
The first option we'll look at here is Autosave . Auto Save was first introduced in Photoshop in CS6. This option tells Photoshop to automatically back up your work at regular intervals.
I can say from experience that autosave has saved me what you know on several occasions, especially on my old laptop.
By default, Auto Save is set to back up your work every 10 minutes.
That's usually fine. But depending on your work speed and the reliability of your computer, you may want to shorten the interval from 10 minutes to 5 minutes instead.
You can also choose a longer interval if backups cause performance issues, but doing so increases the risk of losing your work:
The list of recent files contains
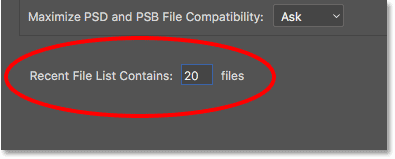
Another important option in the File Handling preferences is Recent File List Contains . This option determines the number of previously opened files Photoshop will track.
In Photoshop CC, your recent files appear as thumbnails on the Start screen every time you start Photoshop.
In CS6, you can access your recent files by going to a menu Fillet in the menu bar and choose Open Recent (This also works in Photoshop CC).
By default, Photoshop will keep track of the last 20 files you worked on. You can increase the value up to 100.
Or if you don't want anyone to know what you were working on, set the value to 0 to disable this option:
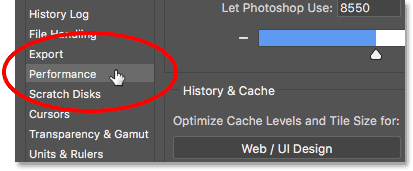
performance preferences
Next, let's take a look at some of the settings that have to do with Photoshop performance. Choose a category the performance on the left:
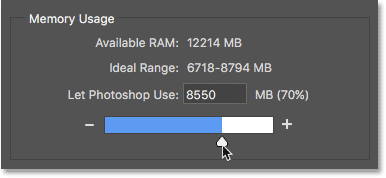
memory usage
و memory usage The option in the Performance category controls how much of your computer's memory is reserved for Photoshop.
Photoshop loves memory and will generally run better the more memory you get.
By default, Adobe reserves 70% of your computer's memory for Photoshop. If Photoshop is struggling when you are working on large files
Try to increase the memory usage value.
You can increase memory usage up to 100%. However, keep in mind that if you have other apps open as well, all of them require memory.
Whenever possible, close all other applications when you're working in Photoshop.
If you want to open other apps, try the memory usage value is no more than 90%. Lower it if you encounter problems. You will need to restart Photoshop for the change to take effect:
History of countries
Another option that can directly affect Photoshop performance is HistoryStates .
History states refer to the number of steps Photoshop tracks as we work. The more steps we remember, the more steps we can undo to return to a previous state.
History states are stored in memory, so many states can slow down Photoshop.
In Photoshop CS6, the default number of history states was 20. At that time
I recommended increasing the value to 30. In Photoshop CC, Adobe increased the default value to 50. I do not recommend increasing it beyond 50.
Unless you really need a lot of undo files. If you experience performance issues, try lowering the value. Again, you'll need to restart Photoshop for the change to take effect:

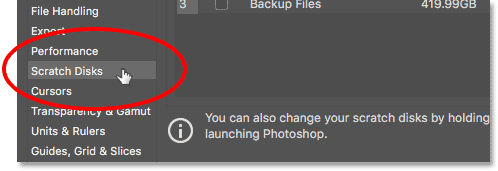
Scratch Disks preferences (Photoshop CC)
There is another performance option to look at. in Photoshop CC
Choose a category Scratch Disks on the left. In Photoshop CS6, stay in the performance category:
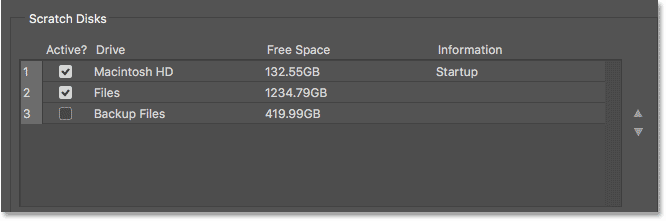
scratch discs
A working disc The part of your computer's hard drive that Photoshop uses as extra memory if your system runs out of memory. As long as your computer has enough memory
Photoshop will not need to use the scratch disk. if it was not You need a scratch disk, and it will use whatever hard drive(s) you selected in the scratch disks option.
The main hard disk drive in your computer is known as a disk startup .
This may be the only hard drive you have. If so, it is selected by default and there's really nothing you need to do.
But if you have two or more hard drives, choose which drive it is Not your startup disk. Your operating system uses the startup disk a lot
So you will get better performance from Photoshop by choosing a different drive. Also, if you know the speed of your hard drives, you will again get better performance by choosing the fastest drive.
Use an SSD for best performance
Finally, if one of your computer's hard drives is SSD (Solid State Drive), then choose the SSD as the temporary disk.
SSDs are much faster than traditional hard drives and can greatly improve performance.
Even if your SSD is also the startup disk, it's still the best choice. In my case
My startup disk is an SSD drive so I selected it as my primary scratch disk. I also have a secondary flash drive as a backup backup. However, as you mentioned
Photoshop will only use the spooler disk if the system is out of memory. If Photoshop routinely runs out of system memory, adding additional memory (RAM) to your computer will give you the best results:
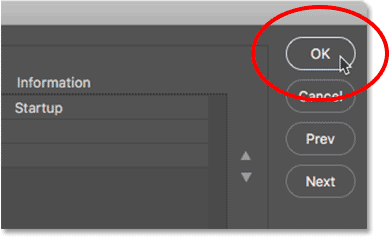
Close the Preferences dialog
To accept the changes, click OK" to close the Preferences dialog. Remember that some of your changes will not take effect until you restart Photoshop: