

How to enlarge and reduce an image using Photoshop
Displays the current zoom level
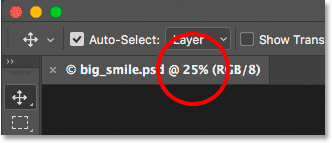
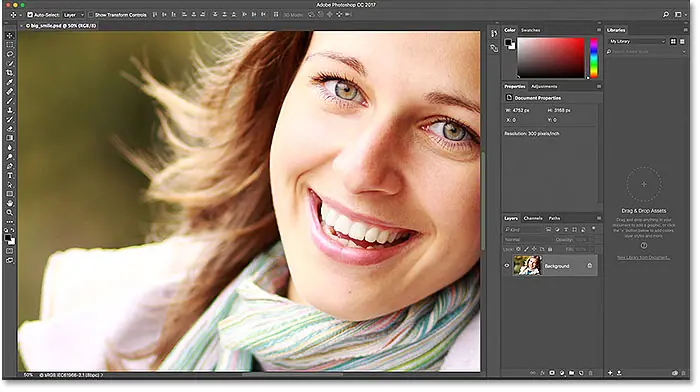
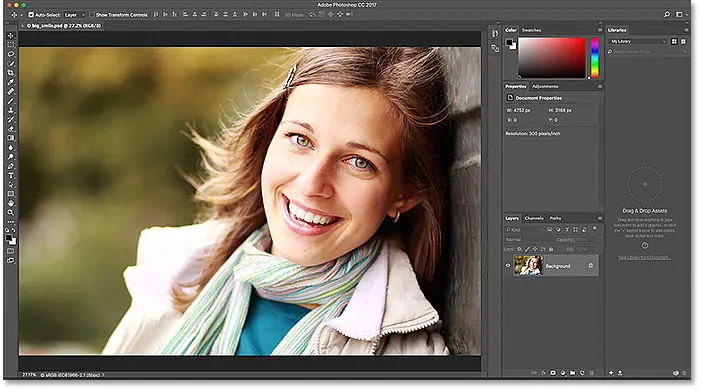
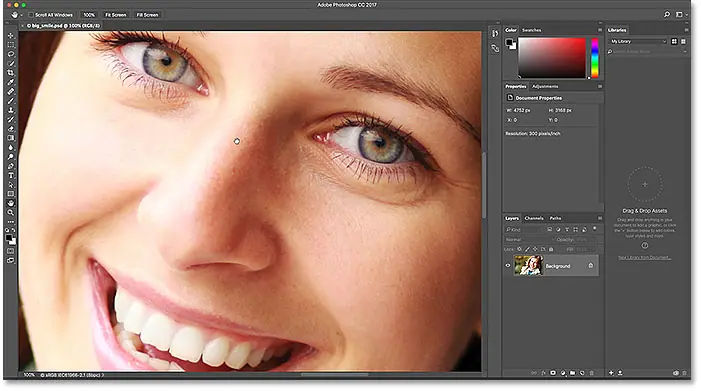
First, let's learn where to find the current zoom level in Photoshop. After all, before we go zooming in and out, it's helpful to know what your current zoom level actually is. Photoshop displays the current zoom level in two different locations. The first is on the document tab just above the image. You will find the zoom level to the right of the file name. Here we see that my image is currently rendered at 25% display size:
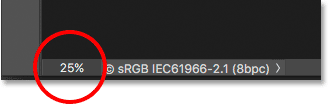
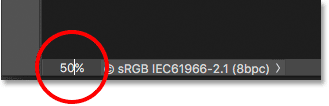
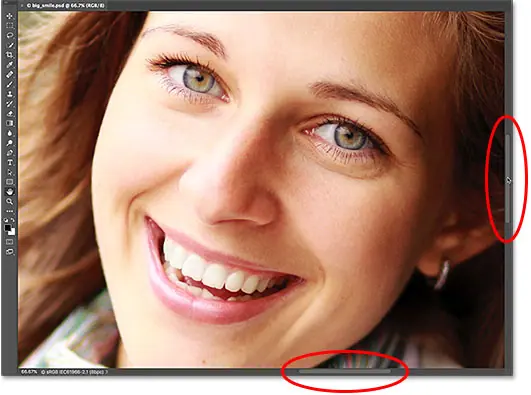
The second place where you can find the current zoom level is in the lower left corner of the document window. Again, it shows that I'm viewing my image at 25% of its actual size:
Change the zoom level
Why are two different places displaying the same information? Well, the zoom level displayed in the document tab at the top is for informational purposes only. In other words, we can't actually change the zoom level from the tab. But we Can Change the zoom level from the bottom left corner.
Read also:How to transfer JPEG images from Lightroom to PhotoshopLet's say I want to enlarge my image by increasing the zoom level from 25% to 50%. To change the zoom level, tap the current level to highlight it. Then enter your new value. I'll click to select "25" and change it to "50". There is no need to type the percentage (%) symbol because Photoshop includes it automatically:
To accept the change, tap Enter (Win) / Return (Mac) on your keyboard and Photoshop instantly jumps the image to the new zoom level:
How to keep focus on zoom level box
But the problem we are facing is that once you press Enter (Win) / Return (Mac) To accept the new value, the input box loses focus. In other words, if we want to try a different zoom level, we first need to click again on the current value to highlight it before we can type in the new value. At least, that's how it normally works. But this is a great trick. Press and hold a key Shift while pressing Enter (Win) / Return (Mac) to accept the value. The zoom level will still be highlighted. This allows you to try different values without having to specify the current value first:
Read also:How to cut an image into a circle using Photoshop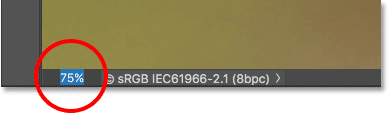
Change the zoom level using the Scrubby slider
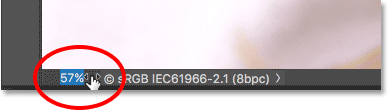
Another great trick to use with the zoom level box is to change its value with Slider in Photoshop. Move the mouse pointer over the input box, then press and hold Ctrl . key (Win) / Command (Mac) on the keyboard. The mouse pointer will change to a small scroll bar icon (a small hand with an arrow pointing left and right). Click the input box, hold the mouse button, and drag left or right to increase or decrease the value in increments of 1%. or click on Shift+Ctrl (Win) / Shift+Command (Mac) and drag to change the value in 10% increments:
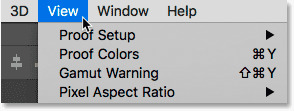
Display menu options
Another way to change the zoom level of your photo is from the menu عرض in the menu bar along the top of the screen. Here, you'll find several options grouped together that control the display size of the image:
Zoom in and out commands
first two options, Zoom in و zoom out , is the most obvious. Choose Zoom in to zoom in or Zoom in to zoom out. Pretty basic stuff:
Read also:How to install Adobe Bridge CC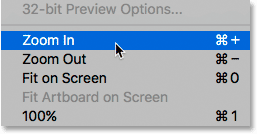
Zoom in and out gradually
Each time you select the Zoom In command from the View menu, Photoshop will zoom in the image further by certain size increments. For example, if you are currently viewing an image at a zoom level of 25%, selecting Zoom In will enlarge the image to 33.33%. Selecting it again will zoom to 50%, then 66.67%, then 100%. Of course, you can continue to zoom in beyond 100%. In fact, Photoshop allowed us to zoom in up to 3200% (although you might want to check your eyes if you need to zoom in that close). The same applies to the minimize command. Each time you select Zoom out, it will scale the image down in incremental steps.
Zoom in and out on the keyboard
The zoom in and out commands in Photoshop are very useful. But unless you have a lot of free time on your hands, you won't want to keep going up the View menu every time you need to select it. Alternatively, if you look to the right of the Zoom In and Zoom Out options, you'll see that each one has a handy keyboard shortcut. These two shortcuts are worth saving because you'll use them all the time in your work in Photoshop.
To quickly enlarge an image, on a Windows PC, press and hold a key Ctrl on the keyboard and press plus sign ( + ). On a Mac, press and hold a key Command And press plus sign ( + ). To zoom out, on a Windows PC, press and hold a key Ctrl And press minus sign ( - ). On a Mac, press and hold a key Command And press minus sign ( - ). Each time you press the shortcut, Photoshop will zoom in or out using the exact increments I mentioned earlier (25%, 33.33%, 50%, and so on).
Enlarge or reduce the center of the image
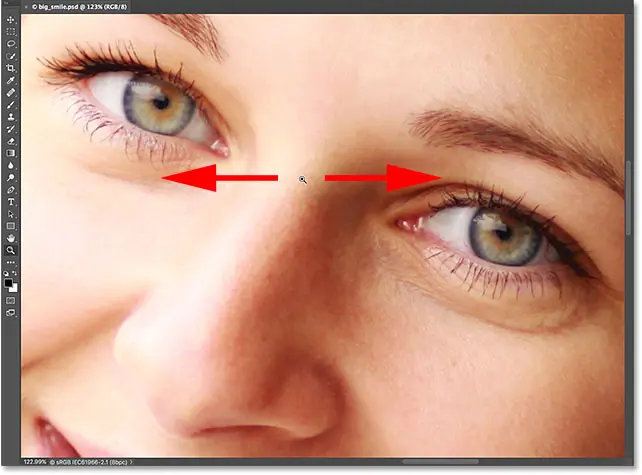
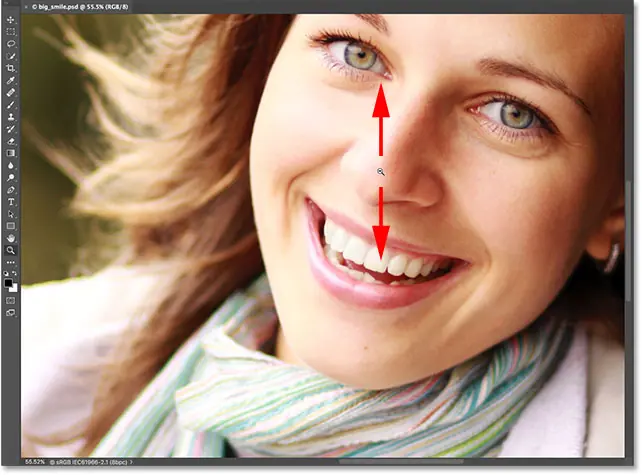
The only problem with the Zoom In and Zoom Out commands is that they provide no control over which part of the image we zoom in on (or out of). They just get bigger or smaller than center Image. Here, I pressed the keyboard shortcut several times to zoom in on my image. As we can see, Photoshop simply zoomed in on the center of the image, which focused on the side of the woman's face. If my goal was to change her eye color, for example, this wouldn't be very helpful. To control which part of the image we zoom in, we need to use something different. We'll look at what's "different" in a moment:
Display mode “Fit on Screen”
There is a third option directly below the Zoom In and Zoom Out options in the View menu, and it is Fit on Screen . It also contains a keyboard shortcut that you want to save. On a Windows PC, it is Ctrl + 0 button . On a Mac, it is Command + 0 :
The Fit on Screen command tells Photoshop to instantly go to whatever zoom level is needed so that the image fits exactly within the bounds of the document window. It's perfect for quickly returning to a bird's eye view of your work after zooming in on smaller details:
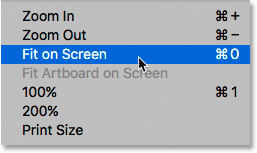
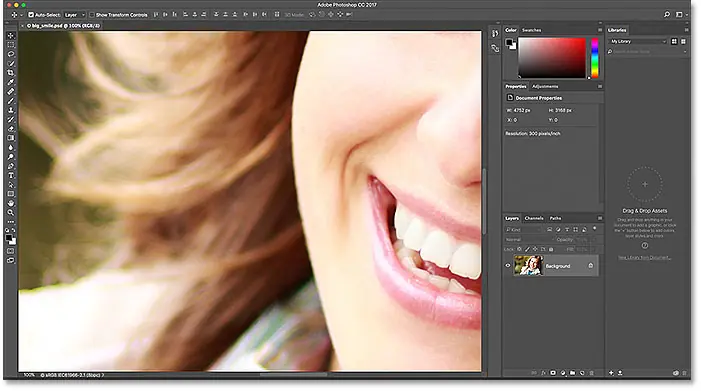
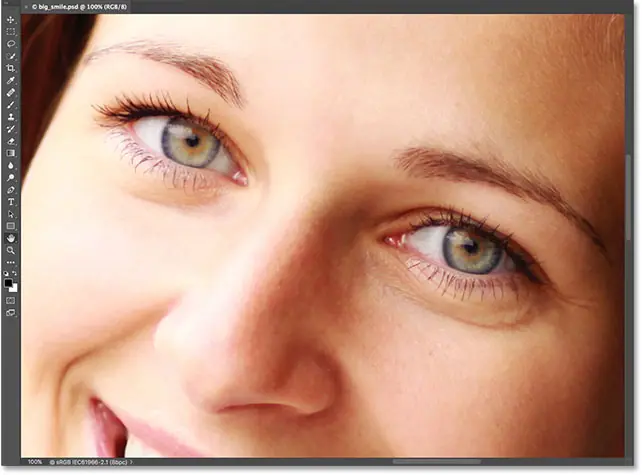
display mode "100%"
Another very useful option under the View menu is 100% (known as "physical pixels" in earlier versions of Photoshop). Contains a keyboard shortcut Ctrl + 1 (Win) / Command + 1 (Mac):
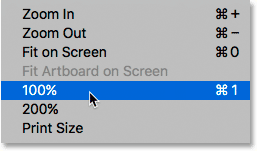
View 100% mode instantly jumps your zoom level to 100%. At this level, each individual pixel in your image occupies exactly one pixel on your screen. The benefit of viewing your image at 100% is that it is the only zoom level that allows us to see the full detail of our image. If your image is larger than your screen's display resolution, as it is here, you'll only see a portion of the image at a time. To display the remainder of it, we'll need a way to move and scroll the image around within the document window. We'll learn how to do that when we look at hand tool In Photoshop later:
Shortcodes, Actions, and Filters plugin: shortcode error [ ads-basics-middle ]
Zoom tool
So far, none of the ways we've looked at zooming in and out have given us more control over which part of an image we see. For more precise control, we use Zoom tool in Photoshop. You'll find the magnify tool near the bottom of the toolbar along the left of the screen (it's the one with the magnifying glass icon). Click the Zoom tool to select it. You can also select the Zoom tool by clicking on the letter Z (for "Zoom") on the keyboard:

With the Zoom tool selected, your mouse pointer will turn into a magnifying glass with a plus sign in the middle of it. The plus sign means that the zoom tool is currently set to the “zoom in” position (instead of the “zoom out” position). This is the default mode for the zoom tool:
Zoom in using the zoom tool
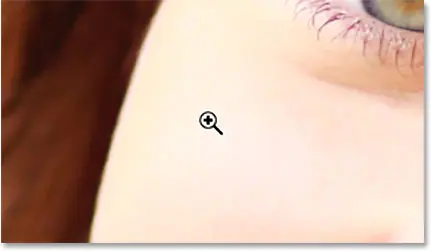
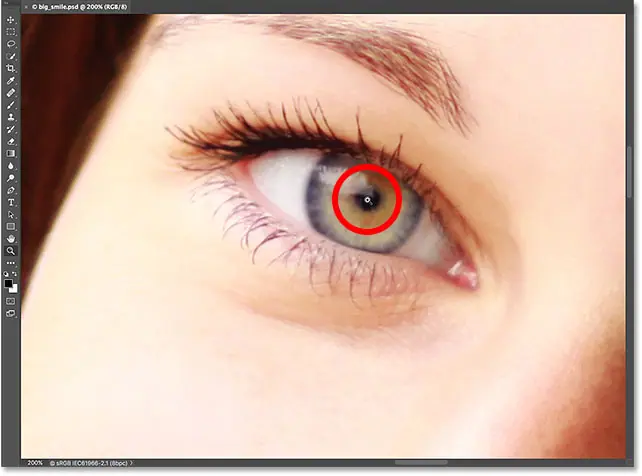
To zoom in on a specific part of your photo, simply place the zoom tool over the area and click. Repeatedly click on the same spot to zoom in closer. Here, I clicked multiple times on one of the woman's eyes to make it larger:
Zoom out using the zoom tool
To zoom out with the Zoom Tool, press and hold a key Alt (Win) / Option (Mac) on the keyboard. This temporarily toggles the Zoom in tool to the "Zoom Out" mode. You'll see the plus sign in the center of the magnifying glass change to minus sign :
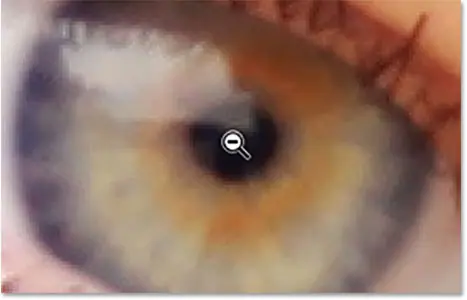
While holding down the Alt (Win) / Option (Mac) key, place the Zoom tool back over the area you want to zoom out from and click. Click repeatedly to zoom out larger. When you release the Alt (Win) / Option (Mac) key, the Zoom tool will return to its default "Zoom In" mode:
Temporarily access the zoom tool from the keyboard
Instead of selecting the zoom tool from the toolbar every time we need it, the faster way is to select it from the keyboard. We've already seen that we can select the zoom tool by clicking on a character Z . But even this isn't the best way to work because it leaves the Zoom tool active until we choose a different tool.
The best way is to switch Temporarily To the zoom tool, press and hold Ctrl+spacebar (Win) / Command+spacebar (Mac) on the keyboard. This switches you to the zoom tool from whatever tool was active, allowing you to click an area of the image to zoom in. Once you zoom in, release the keys to return to the previously active instrument so you can keep it on the action without skipping a beat. If you need to zoom out, press and hold Ctrl + Alt + spacebar (Win) / Option + spacebar (Mac) on the keyboard to temporarily access the Zoom In tool. Click the image to zoom out, then release the keys to return to the previous widget.
using continuous zoom
Another way to use the Zoom tool is to take advantage of a feature known as Zoom Continuous Zoom . First, select the Zoom tool either from the toolbar or by using a keyboard shortcut. Click on the place you want to enlarge and hold Hold down the mouse button . Photoshop will continuously zoom in toward that spot until you release the mouse button. Add a key Alt (Win) / Option (Mac) to zoom out continuously until you release the mouse button.
Using Scrubby Zoom
There is also a way to enlarge the image faster and have better control over the zoom level, using Scrubby Zoom in Photoshop. In fact, Scrubby Zoom is my favorite way to work. With the Zoom tool selected, click where you want to zoom in. Once clicked, while holding the mouse button, drag the mouse left or right. Dragging to the right will zoom in. Swipe left to zoom out. If you swipe quickly, you will quickly zoom in. If you drag slowly it will zoom in slowly but you will get very precise control over the zoom level. Likewise, if you quickly click and drag your mouse to the left, you will quickly zoom out from where you clicked. Slowly dragging to the left gives you fine control over the zoom level while zoomed out:
Zoom with scroll wheel
Another way to have more granular control over your zoom level is to use scroll wheel in the mouse. Move your mouse pointer over the area you want to zoom in or out of. Then press and hold a key Alt (Win) / Option (Mac) on the keyboard and scroll the mouse wheel up or down. Scroll up to zoom in or out. Scroll fast or slow to control the zoom speed. The nice thing about this trick is that you don't need to select the zoom tool. Works with any of the Photoshop tools:
Select an area using the zoom tool
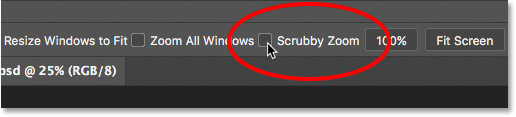
A moment ago, we learned how to use Photoshop's Scrubby Zoom feature, which allows us to zoom in and out of our image by clicking and dragging left or right. By default, Scrubby Zoom is enabled, but we can actually disable it to get another way to enlarge the image. With the Zoom tool selected, you will find an option Scrubby Zoom in the options bar along the top of the screen. To disable it, click inside its checkbox:
With Scrubby Zoom disabled, the Zoom tool behaves like the Rectangular Marquee Tool in Photoshop. Simply click and drag the selection box around the area you want to enlarge. Here, I'm dragging a selection around a woman's mouth:
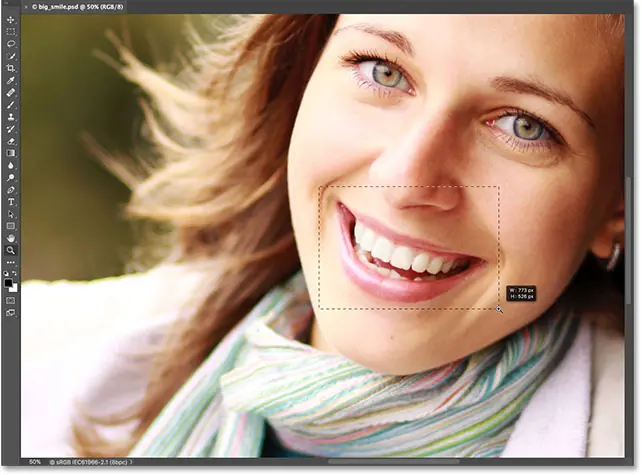
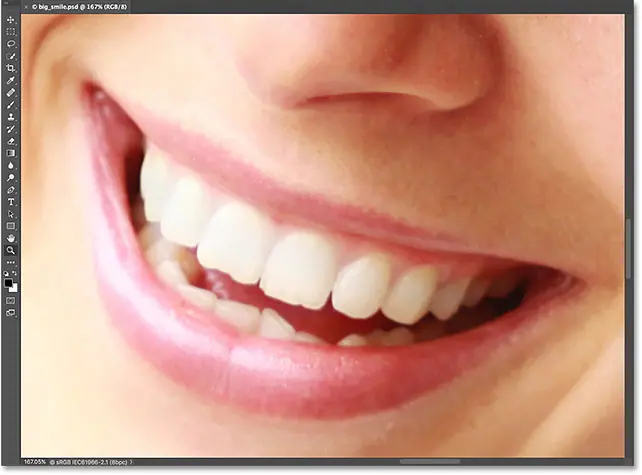
When you release the mouse button, Photoshop instantly enlarges the area you selected and centers it on the screen. You can return to the Scrubby Zoom behavior at any time by selecting the option again in the options bar:
How to animate and scroll an image in Photoshop
hand tool
Now that we know how to zoom in and out of an image, let's learn how to move the image around within the document window. An obvious problem with zooming in is that we can only see the part of the image that we've zoomed in. The rest of it extends off screen. When that happens, we need a way to move and reposition the image so we can examine different areas.
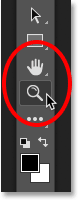
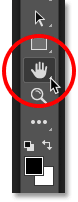
This is known as stirring . To animate an image in Photoshop, we use hand tool . You'll find it directly above the Zoom tool near the bottom of the toolbar (not surprisingly, it's the one with the hand icon). You can also select the Hand Tool from the keyboard by pressing the letter H :
With the Hand tool selected, the mouse pointer changes to a hand icon:
![]()
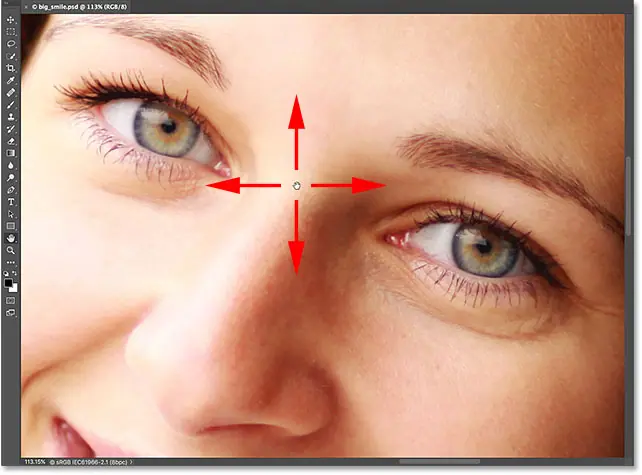
To pan from one part of the image to another, click with the hand tool, hold down the mouse button, and drag the image within the document window. You can move the image in any direction. Release the mouse button to leave:
Temporarily switch to the Hand tool from the keyboard
Just like with the Zoom tool, selecting the Hand tool from the toolbar every time you need it can be very time consuming. Using the keyboard shortcut (“H”) does not help, because in either case the Hand Tool remains active until we select a different tool. Fortunately, Photoshop gives us a better and faster option, by selecting the Hand tool Temporarily . To switch to the Hand Tool when any other tool is active, press and hold spacebar on the keyboard. Click and drag the image to move it, then release the spacebar to return to the previously active tool.
Scroll the image using scroll bars
There are also two ways to scroll the image up and down and left and right. The most obvious way is to use sliders Along the right and bottom of the document window:
Scroll using the scroll wheel
Another way to pass the image, and one that doesn't need to specify the hand tool (and it works with any tool) is to use scroll wheel on the mouse. Scroll up on the wheel to move the image up in the document window, or scroll down to move it down. Press and hold Ctrl . key (Win) / Command (Mac) on your keyboard and scroll up to move the image left, or scroll down to move it right:
Bird's eye view
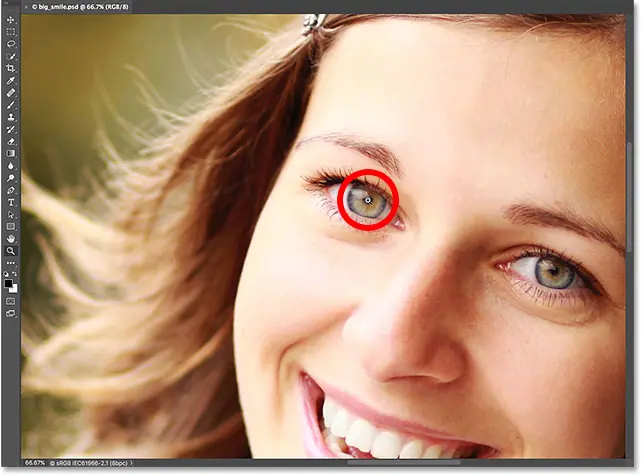
The last way to animate an image in Photoshop is to use what is known as Bird's Eye View . It is not only very useful, but also very interesting. To use the bird's eye view, press and hold the letter H on the keyboard. Even if you've already selected the Hand tool, you'll still need to press and hold H. Photoshop will enlarge the image so it fits perfectly on the screen. As you zoom out the image, you will see Rectangular square You can move it. Drag the box over the area you want to zoom in on. In my case, I'm going to drag it over the woman's eyes:

When you release the mouse button, Photoshop immediately moves to that area and places it in the center of the screen:
Choose "Fit to Screen" and "100%" from the toolbar
Let's finish this tutorial with a few more time-saving shortcuts. Earlier, we learned about an order Fit on Screen In Photoshop under the View menu that instantly fits the entire image on the screen. Contains a keyboard shortcut Ctrl + 0 (Win()/ Command + 0 (Mac). We also learned about an order 100% Which jumps the image to 100% zoom level. And it has a keyboard shortcut Ctrl + 1 (Win) / Command + 1 (Sword).
If you ever find yourself wanting to use either of these two commands but can't remember the keyboard shortcut, don't worry. Besides being available under the View menu in the menu bar, it can also be selected from the toolbar. To instantly fit your image on the screen, double-tap hand tool in the toolbar. To go to the 100% zoom level, double-click Zoom tool :