

Step 1: Make initial edits to the image in Lightroom
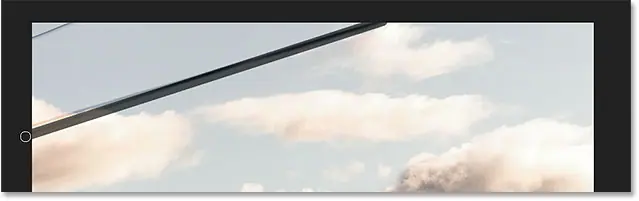
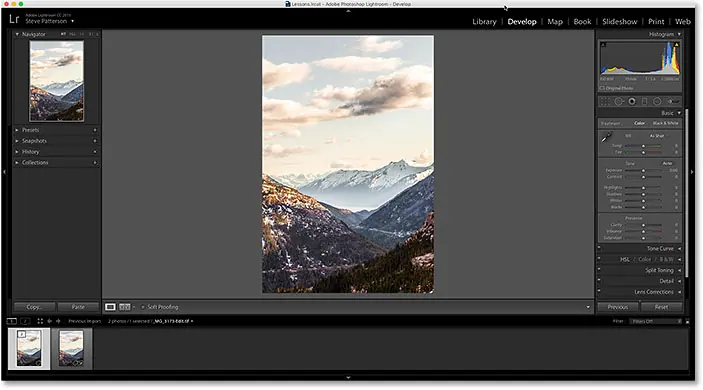
As with the previous tutorial, I won't cover Lightroom or Photoshop in any great detail here so we can focus our attention on how to transfer JPEG files between them. This is an image I'm currently working on development unit Lightroom. I shot this through the window of a train as it travels through the mountains. It's not bad, but I was so focused on the scene that I failed to notice the water wires running across the top of the frame:
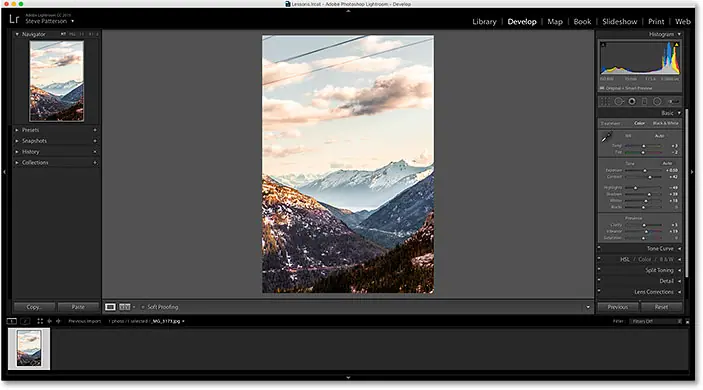
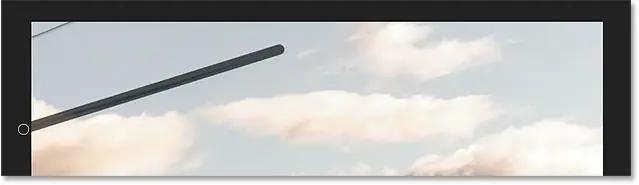
Here's a larger view of the image to make things easier to see:
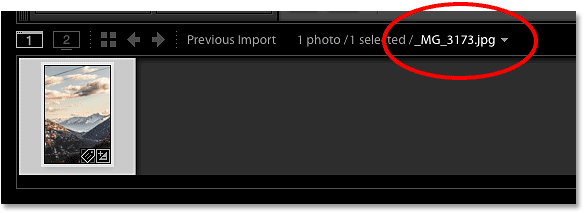
This image has been saved as a JPEG file. We know it's a JPEG file because if we look at the bar above film strip Along the bottom of Lightroom, we can see not only the file name, but also the “” extension. jpg " in the end:
I'd like to remove those wires, but I can't do that in Lightroom. This is because, Adobe Lightroom is not a pixel editor. Instead of changing the pixels in the image, Lightroom works by storing instructions on how to improve and enhance the appearance of the image, and what it shows us on the screen is just preview What's the picture Will Look with these instructions applied. Our changes aren't actually applied until we go to export the image later, either for web, for print, or as we'll see, when we pass the image into Photoshop. Until then, Lightroom doesn't apply our changes to the original photo. Instead, it creates Copyof the image when we go to export it and apply our changes to the copy. The original photo is never damaged.
The advantage of the way Lightroom works is that everything we do is completely non-destructive. We can make as many changes as we like without affecting the original image at all. Using Lightroom's simple and intuitive sliders, we can easily fix any general exposure, contrast, or color problems, and bring out details hidden in shadows and highlights. We can add some raw image sharpening, fix lens distortion issues, and even add some basic effects, like color tone splitting or vignetting. There's a lot Lightroom can do.
However, there is much more not Lightroom can do it. That's because there's only so much we can do without changing the pixels in an image. If I wanted to remove those wires, for example, I would need to free up the pixels. Lightroom can't do that, but Photoshop certainly can. The pixel-editing power of Photoshop is unparalleled, and once we learn to use Lightroom and Photoshop together as a team, and take advantage of each software's unique strengths, there's nothing we can't do with our images.
The general rule of thumb in a good Lightroom / Photoshop workflow is to make as many image improvements as possible in Lightroom. In many cases, you'll find that Lightroom is all you need. But if you've done everything you could in Lightroom and the image still needs some more editing, like my problem here with watery wires, then it's time to pass the image over to Photoshop.
Plugin for icons shortcode, actions and filters: shortcode error [ ads-photoretouch-middle ]
Step 2: Transfer the image to Photoshop
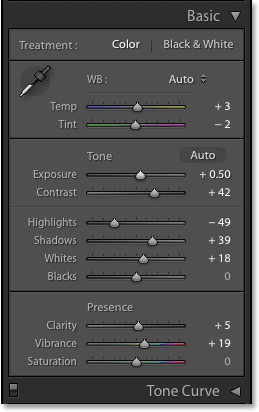
If we look at my board the basic In the Lightroom development module, you'll notice that I've made some initial adjustments to exposure, contrast, and color:
I've also added some initial sharpening in a panel the details And I fixed some lens distortion in the panel Lens correction . There isn't much to do with this image in Lightroom, so I'm ready to move it into Photoshop.
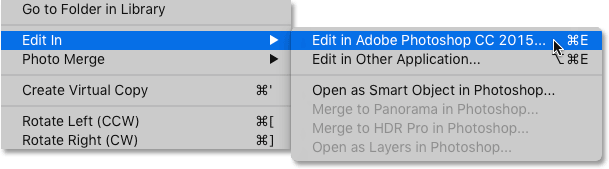
Read also:How to reset Photoshop preferencesTo transfer a JPEG file from Lightroom to Photoshop, go to the menu Pictures (in Lightroom) in the menu bar along the top of the screen, and choose edit in , then choose Editing in Adobe Photoshop . Your specific version of Photoshop will be listed, in my case here is Photoshop CC 2015. Once you know where the actual command is, you may find it easier in the future to press Ctrl + E (Win) / Command + E (Mac) on your keyboard, but either way works:
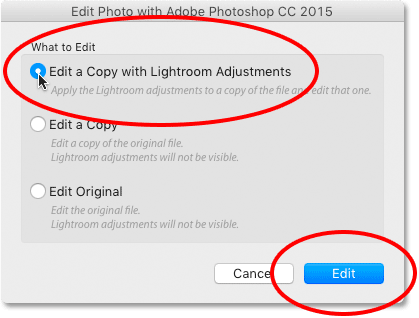
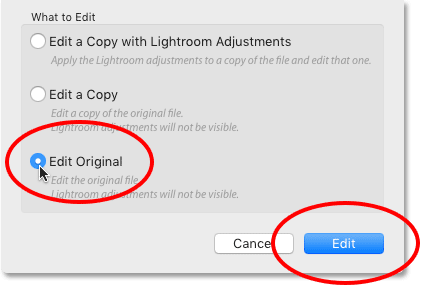
Before you send the file to Photoshop, Lightroom will ask you what exactly you want to send, and there are three options: Edit a copy with Lightroom adjustments ، and copy editing ، and edit the original . If this is your first time sending the image to Photoshop from Lightroom, as it is for me with this one, choose the first option, Edit a copy with Lightroom adjustments , then click the . button Release . This will create a copy of your image to send to Photoshop, and it will embed your Lightroom adjustments into the image so that they are visible in Photoshop. We'll look at the other two options later:
This will launch Photoshop if it isn't already running, and then your image will open in Photoshop:

Step 3: Edit the image in Photoshop
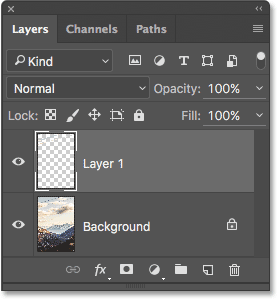
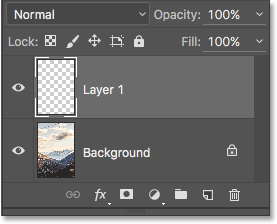
With my image now open in Photoshop, I can remove the wires. I'm going to go through this quickly because removing the wires from the image isn't really the focus of this tutorial. I'll start by adding a new blank layer to the document to keep my edits separate from the image itself. To do this, I will click on an icon new layer at the bottom of the Layers panel :
![]()
Photoshop adds the new layer above the background layer:
to remove wires, I'll be using the Spot Healing Brush tool of Photoshop which I'm going to take from Toolbar Along the left of the screen:
in Options bar At the top of the screen, I'll make sure to select Content-Aware و Sample All Layers :

I'll start with the lowest of the three wires. First, I'm going to resize the brush so that it's a little wider than the wire itself. To do that , I will use the left and right bracket keys ( [ و ] ) on the keyboard. Pressing the left bracket key repeatedly will make the brush smaller. The right parenthesis key will make it bigger:
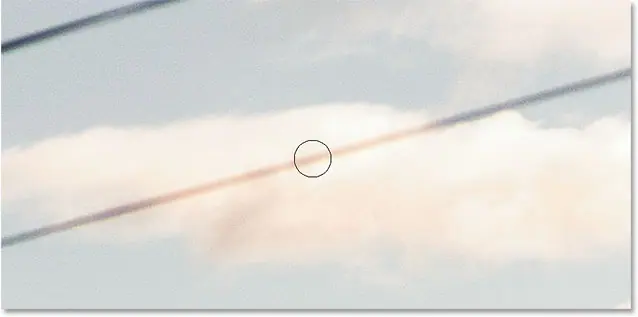
Since the wire is running in a straight line, I'm going to start by tapping with the Spot Healing Brush Tool on one end of the wire. Next, I will press and hold a key Shift , go to the other end of the wire, and click again. This tells Photoshop to draw a straight line between the two points you clicked. At first, all we see is a dark gray overlay of where I drew it. This is the area that Photoshop analyzes, figuring out what to remove and what to replace with:
After a second or two, the overlay disappears, and so does the wire:

I'm going to do the same thing with the wire above it, although this one looks like two wires overlapping because they branch out as they get closer to the left edge of the picture. I will remove it in two passes. First, I'm going to press down on the right end of the wire(s) with the Spot Healing Brush Tool. Next, I will press and hold a key Shift And click on the left end to draw a straight line between the points you clicked:
Photoshop takes a second or two to analyze the area, and then does another excellent job of removing the wire. To get the remainder of the wire branched out above it, I'll click again on one end of the wire and then Shift-click on the other end to draw a straight line over it:
And like magic, the wire disappeared. Finally, I'll remove the remaining piece of wire in the upper left corner by clicking, then Shift-clicking on the ends:
And now, thanks to Photoshop's Spot Healing Brush tool and a few simple mouse clicks, the wires are gone:

Step 4: Save and close the image
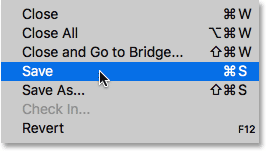
Now that I'm done with my Photoshop adjustments, I want to save my work and send the modified version back to Lightroom. To do this, I'll go to a list a file at the top of the screen and select save . It is very important that we choose “Save” and not “Save As”. The reason is that Lightroom can automatically add the edited version to its catalog for us, but only if the edited version is saved in same folder Like the original picture. If we choose Save As, we risk accidentally saving the file to the wrong location. Choosing Save will ensure that it is saved to the same folder as the original folder:
With the image now saved, we can close it in Photoshop by going back to the menu Fillet and choose Close :
Step 5: Go back to Lightroom
Now that we've saved and closed the image in Photoshop, we can go back to Lightroom where we see the image now updated with our Photoshop adjustments. In my case, the wires at the top are now gone:
However, while it appears to be the same as the picture, if we look down at width bar , and we see that I now already have Two of image versions; One is the original and the other is the version you edited in Photoshop. This is because when we sent the file to Photoshop, we selected the “Edit a copy with Lightroom adjustments” option which told Lightroom to send a copy of the image to Photoshop and not the original. The copy, containing our Photoshop adjustments, has now been brought back to Lightroom and added to its catalog along with the original.
There are two ways we can tell that this is not the original image. First, if we look at the file name above the movie bar, we will find that “” is appended to it. -Edit at the end of the name, indicating that this is the modified version. Also, the original image was a JPEG file, but the edited version is no longer in JPEG format. Instead, it is automatically saved as a file TIFF (with “ .tif ). This is the default behavior for Lightroom. You can change it in Lightroom preferences, and we'll see how to do that in another tutorial:

Another way we can tell this is not the original image is if we look at a painting Basic B, we'll see that all the sliders are reset to zero, because Lightroom considers this edited version a completely new . We can still make more edits in Lightroom if we need to. We do not have access to any of our previous editing history:

Make more adjustments in Photoshop
Now that you're back in Lightroom, what if you need to make more image edits in Photoshop? All you have to do is make sure you have the correct version of the image selected in Lightroom (i.e. the version with previous Photoshop adjustments). Then, as before, go to List Pictures , and select edit in , then choose Editing in Adobe Photoshop :
Lightroom will ask again what exactly you want to send to Photoshop. This time, we don't need another copy of the image. We want to open the same file we worked on earlier in Photoshop. Since the first two options (“Edit a copy with Lightroom adjustments” and “Edit a copy”) will make another copy of the image, they are not the ones we want. Instead, we want to choose the third option, Edit the original .
if I were not If you want to create another copy of the image at this point (perhaps to test an idea), don't choose "Edit Copy with Lightroom Adjustments" like we did originally. The reason is that this option will straighten your image when you open it in Photoshop, so any layers you added earlier will be gone. Instead, choose the second option, edit copy . This will send a new copy of the file to Photoshop with all of your layers intact.
The only other important thing to note here is that if you've made any additional edits to the image in Lightroom since the last time you saved it in Photoshop, choosing either Edit Original or Edit Copy won't pass those edits on to Photoshop. Instead, you'll see the image in Photoshop as it appeared before you made your Lightroom adjustments. However, it is only temporary. Once you're back in Lightroom, your missing edits will reappear.
Since I don't need another copy of the file, I'll choose Edit the original , then I will press the button Release :
This reopens my file in Photoshop, ready for further editing:

If we look at tab Document above the image to display the file name, we see that I opened a TIFF file, not the original JPEG image:

And if we look at my Layers panel, we'll notice that both of my previous layers are still intact: