


How to place an image in multiple text layers in Photoshop
How to fill text with an image
I will use Photoshop CC But any recent version will work.
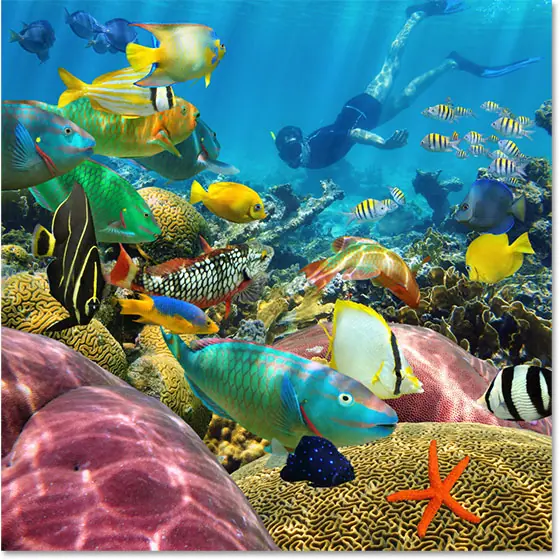
Step 1: Open your photo
Open the image that you want to place within your text
Step 2: Add your text
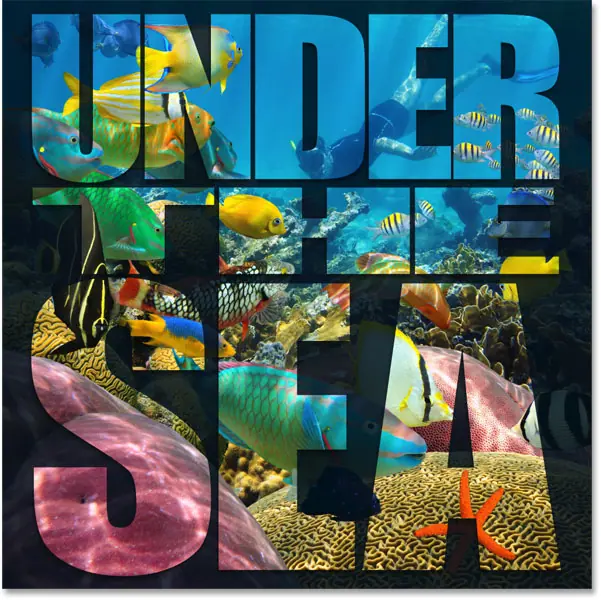
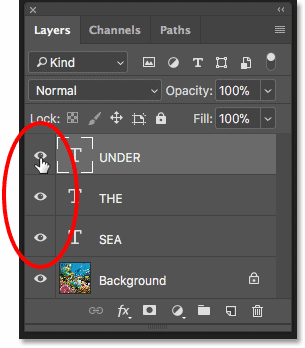
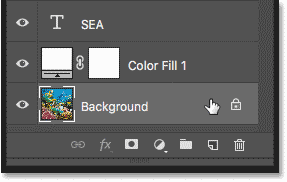
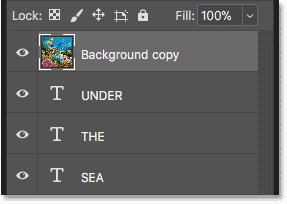
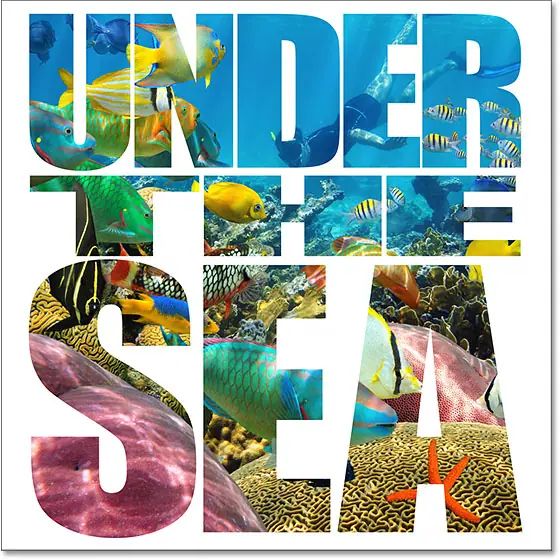
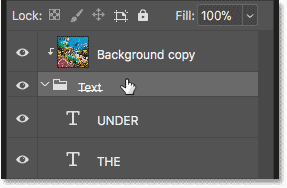
Add the text to the document and place it where you want it in front of the image. If we look in the Layers panel, we see that I've already added some text, and each word ("UNDER", "THE", and "SEA") is on a separate Type layer. The image itself is on the background layer below it. I will run the text by clicking vision symbol Each layer of type:
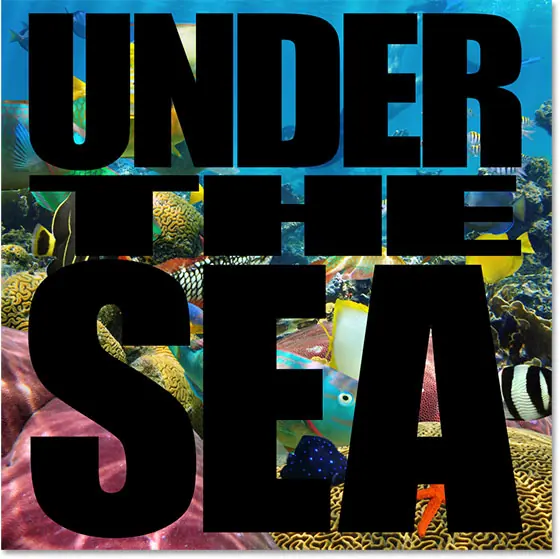
And here we see all three words in front of the picture. You'll want to use black as your type color for now, for reasons we'll see in a bit:
Step 3: Add a solid color fill layer above the background layer
Let's add a background color to the effect. We'll use a solid color fill layer. This will make it easy to change the background to any color we like, as we'll see later. Click background layer In the Layers panel to select them:
Read also:How to add multiple effects around text in Photoshop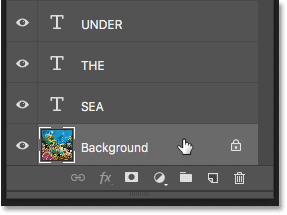
Then click icon New Fill or Adjustment Layer At the bottom of the Layers panel:
![]()
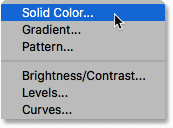
Choose Solid Color From the top of the list:
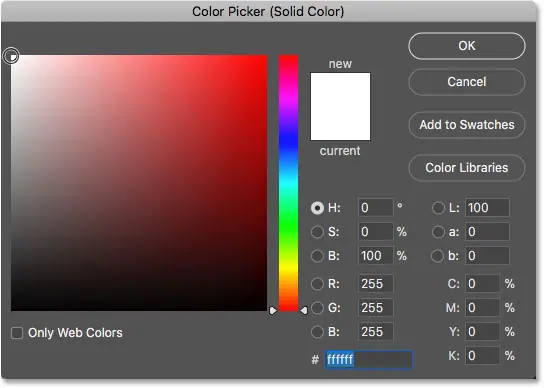
In the Color Picker, choose the White , and then click OK:
Back in the document, the text now appears against a white background (which is why we chose black as the type color). We will learn how to change the background color at the end of the tutorial:

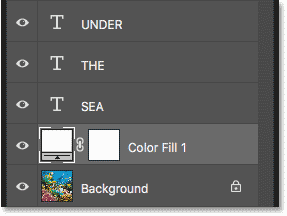
And in the Layers panel, we see a solid color fill layer (“Color Fill 1”) sandwiched between the Type layers and the Background layer, which is why the Fill layer is currently preventing the image from displaying:
Step 4: Make a copy of the background layer
We need to make a copy of the image and move it over the text. Click again on background layer To select it:
Make a copy of the background layer by dragging it down on the icon new layer At the bottom of the Layers panel:
Read also:How to add multiple effects around text in Photoshop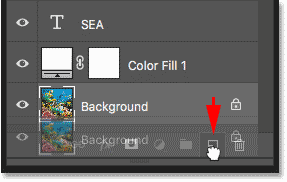
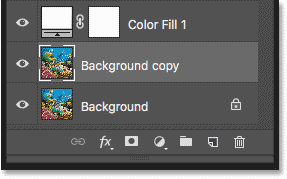
When you release the mouse button, Photoshop makes a copy of the layer, calls it a “background copy,” and places it directly on top of the original:
Step 5: Drag the copy over the type layers
Click and drag the Background copy layer over the type layers. A highlight bar will appear above the type layer at the top:
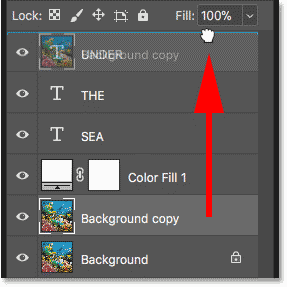
Release the mouse button to drop the layer into place:
The problem: placing one image in three type layers
So far, so good. But now we are facing a problem. We have one picture that needs to be put not just in a word, but in three words, and each word is in a separate type layer. How do we fill in all three words in the picture? If we have a Type one Only, all we have to do to place the image inside the text is create a clipping mask. But watch what happens when I create one.
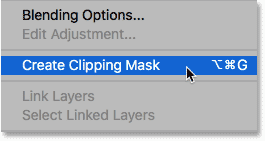
Create a clipping mask
With the Background Copy layer selected, I'll click on menu icon Top right of the Layers panel:
Read also:How to put multiple images into text using Photoshop![]()
Then I will choose Create a clipping mask From the list:
And here we see the problem. Photoshop clips the image to the Type layer directly below it, which positions the image inside the text. But since the image is cut into a layer one Only out of the three type layers, the image appears in only one of the three words, which is not what we want:
Why didn't it work
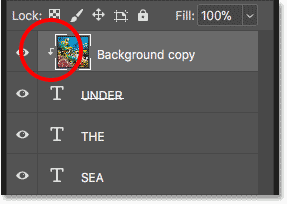
If we look at the “Background copy” layer in the Layers panel, we will see a small arrow next to the preview thumbnail pointing down to the Type layer below it (the layer with the word “UNDER”). This is how Photoshop tells us that the Background Copy layer is clipped to the Type layer. But it's broken into only one Type layer, not all three. We need a way to clip the image to the three type layers at the same time:
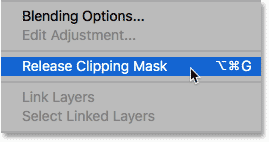
Edit the clipping mask
Since this isn't the effect we want, I'm going to undo the clipping mask by clicking again menu icon in the upper right of the Layers panel and choose Release Clipping Mask From the list:
And now we're back to just seeing the picture:
Step 6: Place the Type Layers into a Layer Group
The solution is to put all of our type layers into a layer group. This way, we can clip the image not to a single layer of the type but to the entire group at once! Click on the type layer at the top to select it:
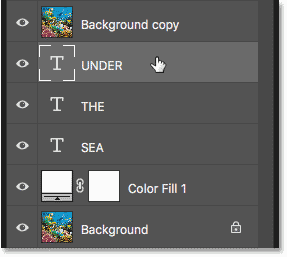
Then, to select other type layers as well, press and hold a key Shift And click on the bottom type layer:
Click menu icon At the top right of the Layers panel:
![]()
Choose New set of layers From the list:
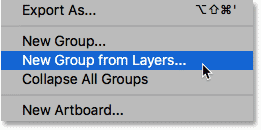
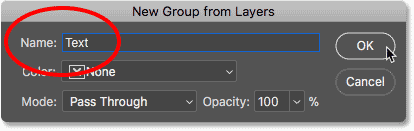
In the New Group from Layers dialog box, name the group “Text” and click OK:
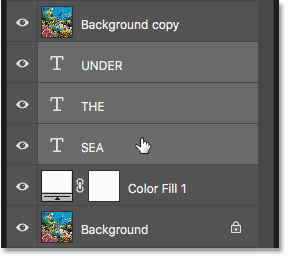
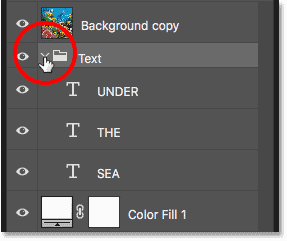
Back in the Layers panel, Type layers now appear inside a layer group called "Text." Click the arrow to the left of the folder icon to rotate the group, open it, and view the layers inside:
Step 7: Select the "Background copy" layer
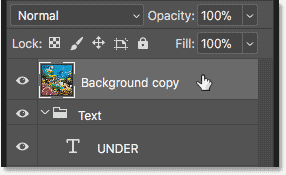
Now that the type layers are inside a group, we can clip the image to the entire group. Click on the "Background copy" layer to select it:
Step 8: Create a Clipping Mask
Click list icon Layers panel:
![]()
Then choose Create Clipping Mask From the list:
This time, Photoshop clips the "background copy" layer not from a single Type layer but to the layer group itself:
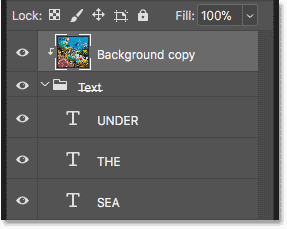
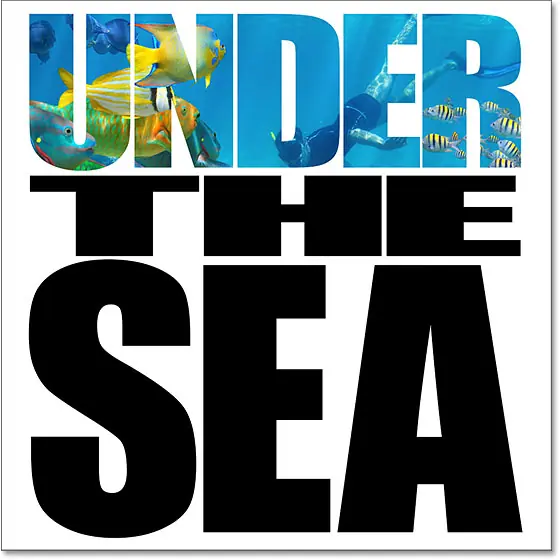
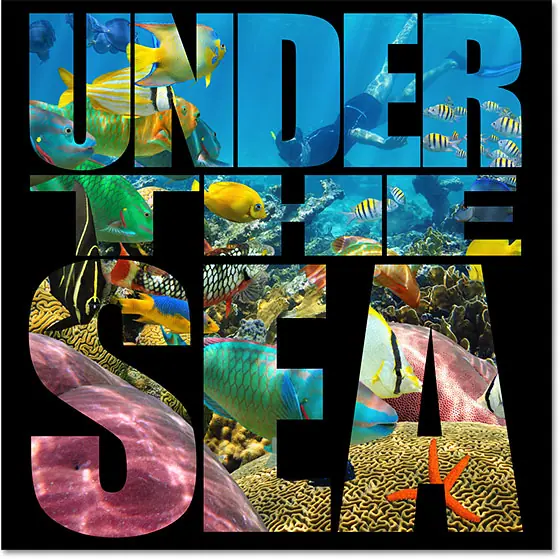
And because we clipped the image to the group, the image immediately appears inside all three words:
Effect customization: Add Drop Shadow
Now that we've created the basic Picture in Text effect, let's look at some ways to customize it. One thing we can do is add a drop shadow to the text. And since we want the drop shadow to affect all of our type layers at once, we'll apply it to the same group of layers. Click the layer group to select it:
Then click an icon Layer Styles (“fx” symbol) at the bottom of the Layers panel:
![]()
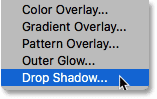
Choose Drop Shadow From the list:
Drop Shadow settings
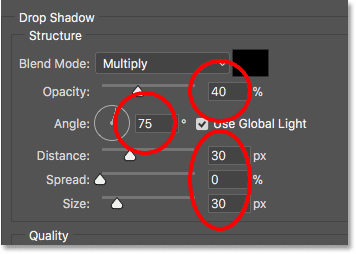
This opens the Layer Style dialog set to Drop Shadow options. Adjust corner ، Diameter و Size of shade to your liking. The angle determines the direction of the light source. Distance controls how far the shadow extends outward from the letters, and Size will scale the edges of the shadow. Then adjust the brightness of the shadow using a slider blackout above.
In my case, I'm going to set the angle to 75 degrees to match the angle of the light rays in the water. Then I'll set the Distance and Size to 30px, and the Opacity to 40%. Click OK when you're done closing the dialog:
And this is my effect with the drop shadow applied. Note that because we applied a drop shadow to the layers group, all type layers within the group are affected:
Customize the effect: change the background color
Another way we can customize the effect is to change the background color. Double-click pregnant Color for solid color fill layer:
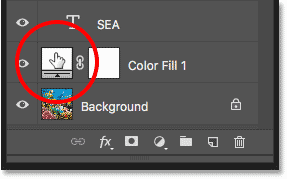
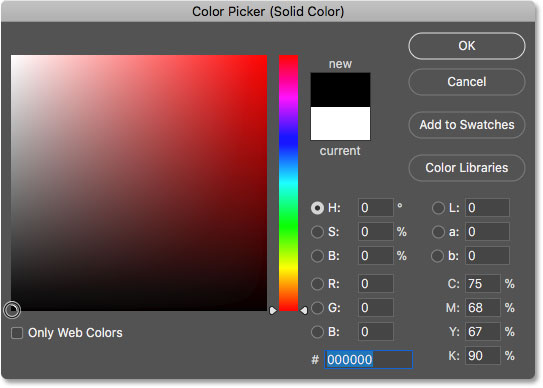
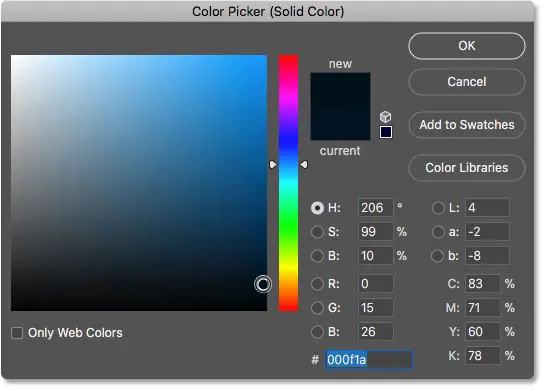
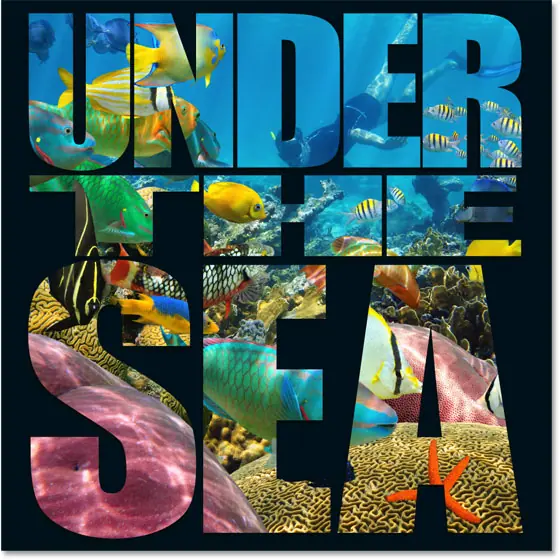
Then choose a different color in the Color Picker. I would choose black:
Here's what the effect looks like with a black background:
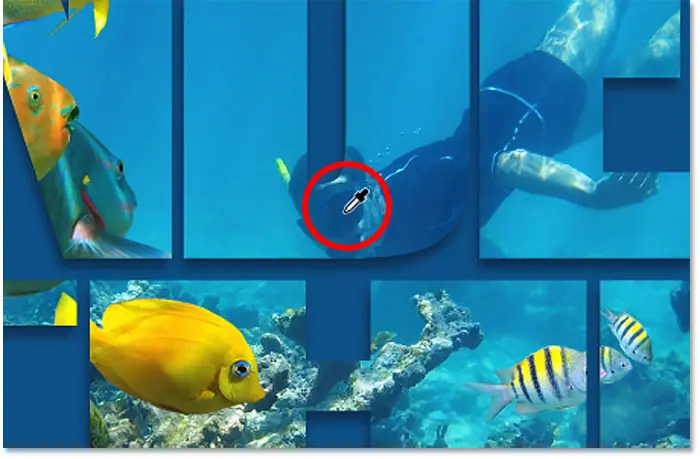
Choose a background color from the image
You can also choose the background color directly from the image inside the letters. With the Color Picker still open, hover your mouse over the image. Your pointer will turn into a dropper. Click a color to test it and set it as your new background color. I would choose a dark blue shade of diver mask:
Here's what that color looks like as a new background:
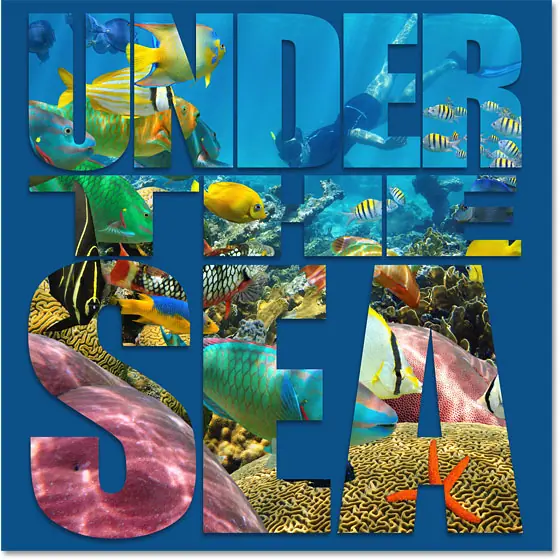
I'm going to use the color I tested, but I'm going to choose a darker shade of it:
Click OK to close from the Color Picker, here is my effect with a dark blue background:
Customize the effect: add transparency to the background
Finally, let's look at another way to customize the effect, which is by adding transparency to the background color. This will allow some of the original images to appear. With the Solid Color fill layer selected, lower the value of the Fill Opacity in the upper right of the Layers panel. The lower it is from its default value of 100%, the more visible the image will be through the background color. I'll lower mine to 85%:

This only allows a hint of the image to show through the blue background, creating the final effect:


