

كيفية إنشاء نص ذهبي في برنامج فوتوشوب
جدول المحتويات
- 1 كيفية إنشاء نص ذهبي في برنامج فوتوشوب
- 1.1 الخطوة 1: قم بإنشاء مستند Photoshop جديد
- 1.2 الخطوة 2: املأ المستند باللون الأسود
- 1.3 الخطوة 3: حدد أداة الكتابة
- 1.4 الخطوة 4: اختر الخط الخاص بك
- 1.5 الخطوة 5: اضبط لون الكتابة على الأبيض
- 1.6 الخطوة 6: أضف النص الخاص بك إلى المستند
- 1.7 الخطوة 7: تغيير حجم النص وإعادة وضعه باستخدام التحويل الحر
- 1.8 الخطوة 8: قم بعمل نسخة من طبقة الكتابة
- 1.9 الخطوة 9: قم بتلوين النص بتأثير طبقة متدرجة تراكب
- 1.10 الخطوة 10: إنشاء تدرج ذهبي مخصص
- 1.11 الخطوة 11: احفظ تدرج الذهب كإعداد مسبق
- 1.12 الخطوة 12: قم بتغيير نمط التدرج إلى انعكاس
- 1.13 الخطوة 13: أضف تأثير طبقة Bevel & Emboss
- 1.14 الخطوة 14: قم بتغيير الأسلوب إلى إزميل صعب
- 1.15 الخطوة 15: قم بتغيير Gloss Contour إلى Ring – Double
- 1.16 الخطوة 16: قم بتغيير الزاوية وقم بتشغيل Anti-Aliasing
- 1.17 الخطوة 17: اضبط Highlight and Shadow Opacity على 75٪
- 1.18 الخطوة 18: قم بزيادة قيمة الحجم لملء الحروف
- 1.19 الخطوة 19: قم بزيادة قيمة العمق
- 1.20 الخطوة 20: أضف تأثير طبقة التوهج الداخلي
- 1.21 الخطوة 21: حدد طبقة الكتابة الأصلية
- 1.22 الخطوة 22: قم بإضافة خط حول الحروف
- 1.23 الخطوة 23: املأ الحد باستخدام الإعداد المسبق للتدرج الذهبي
- 1.24 الخطوة 24: اضبط نمط الخط وموضعه وحجمه
- 1.25 الخطوة 25: قم بتطبيق Bevel & Emboss على السكتة الدماغية
- 1.26 الخطوة 26: تطبيق تأثير طبقة التوهج الخارجي
- 1.27 الخطوة 27: حدد طبقة “نسخة الذهب”
- 1.28 الخطوة 28: أضف طبقة جديدة فوق النص
- 1.29 الخطوة 29: حدد أداة الفرشاة
- 1.30 الخطوة 30: حدد فرشاة “Crosshatch 4” في مجموعة فرش متنوعة
- 1.31 الخطوة 31: اختبر لونًا ذهبيًا لاستخدامه في التألق
- 1.32 الخطوة 32: اضغط على الحروف لإضافة بريق عشوائي
- 1.33 الخطوة 33: خفض عتامة البريق (اختياري)
سأبدأ بخطوات إعداد المستند وإضافة النص الأولي. ولكن إذا كنت قد أضفت النص بالفعل ، فيمكنك الانتقال إلى الخطوة 8 حيث نبدأ في تحويل النص إلى ذهب.
الخطوة 1: قم بإنشاء مستند Photoshop جديد
قم بإنشاء مستند جديد بالانتقال إلى قائمة ” ملف ” في شريط القوائم واختيار ” جديد” :

وفي مربع الحوار مستند جديد، تعيين عرض المستند إلى 1600 بكسل ، و الارتفاع إلى 800 بكسل ، و القرار إلى 72 بكسل / بوصة .
ثم في Photoshop CC ، انقر فوق الزر Create ، أو في CS6 ، انقر فوق OK:

يظهر المستند الجديد:

الخطوة 2: املأ المستند باللون الأسود
للمساعدة في إبراز الحروف الذهبية ، قم بتغيير لون خلفية المستند من الأبيض إلى الأسود.
انتقل إلى قائمة ” تحرير ” في شريط القائمة واختر ” تعبئة” :

ثم في مربع الحوار Fill ، اضبط Contents على Black وانقر فوق OK:
إقرأ أيضا:إنشاء تأثير نص الظل الطويل باستخدام Photoshop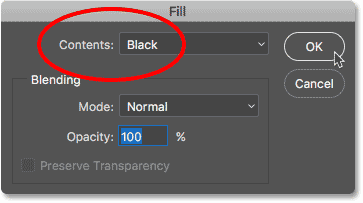
يملأ Photoshop الخلفية باللون الأسود:

الخطوة 3: حدد أداة الكتابة
لإضافة النص الخاص بك ، حدد أداة الكتابة من شريط الأدوات :

الخطوة 4: اختر الخط الخاص بك
ثم في شريط الخيارات ، اختر الخط الخاص بك. في هذا البرنامج التعليمي ، سأبقي الأمور بسيطة وأستخدم Times New Roman Bold ، ولكن يمكنك استخدام أي خط تريده.
اضبط حجم النوع على 72 نقطة . سنقوم بتغيير حجم النوع بمجرد إضافته ، ولكن هذا سيعطينا أكبر حجم مُعد مسبقًا في الوقت الحالي:

الخطوة 5: اضبط لون الكتابة على الأبيض
لرؤية النص على خلفية سوداء ، اضبط اللون الأولي للكتابة على الأبيض . سنضيف الألوان الذهبية لاحقًا باستخدام تأثيرات الطبقة.
انقر فوق حامل اللون في شريط الخيارات:

وفي Color Picker ، اختر الأبيض عن طريق تعيين قيم R و G و B (الأحمر والأخضر والأزرق) على 255 . ثم أغلق Color Picker بالنقر فوق OK:
إقرأ أيضا:تغيير خلفيات تأثير النص في Photoshop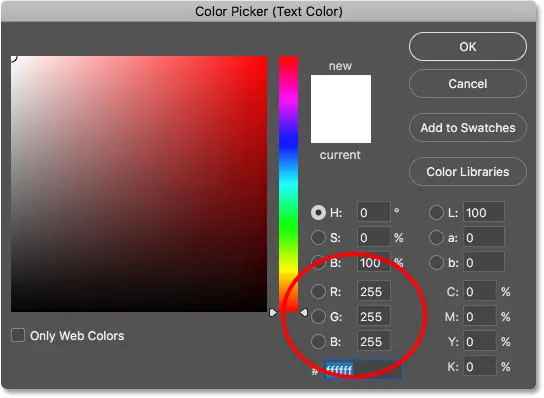
الخطوة 6: أضف النص الخاص بك إلى المستند
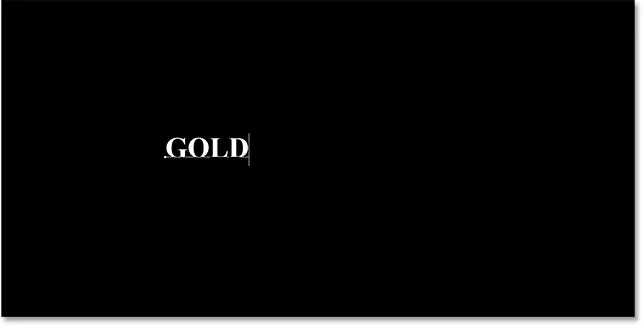
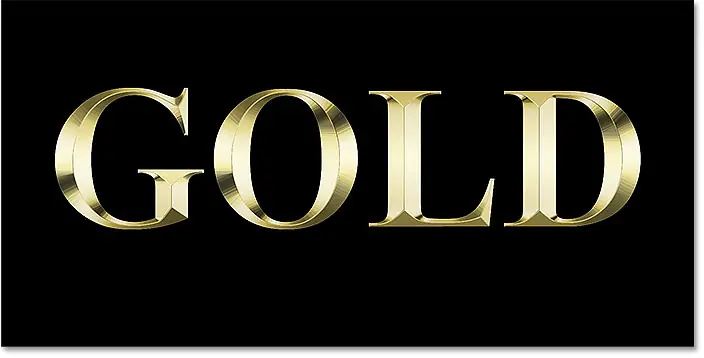
انقر داخل المستند وأضف النص الخاص بك. سأكتب كلمة “ذهب”.
لا تقلق من أن النص صغير جدًا. سنقوم بتغيير حجمه في الخطوة التالية:
لقبول النص ، انقر فوق علامة الاختيار في شريط الخيارات:

الخطوة 7: تغيير حجم النص وإعادة وضعه باستخدام التحويل الحر
لتغيير حجم النص ، ونقله إلى وسط اللوحة ، انتقل إلى قائمة ” تحرير ” واختر التحويل الحر :
ثم قم بتغيير حجم النص عن طريق النقر وسحب أي من مقابض الزاوية التي تظهر حوله.
ولكن هذا هو المكان الذي نواجه فيه الاختلاف بين Photoshop CC و CS6.
كيفية تغيير حجم النص في Photoshop CC
اعتبارًا من Photoshop CC 2019 ، يقفل Free Transform الآن نسبة العرض إلى الارتفاع تلقائيًا وأنت تسحب المقابض ، حتى لا تشوه أشكال الحروف وأنت تغير حجم النص. هذا هو السلوك الذي نريده ، لذا إذا كنت تستخدم Photoshop CC ، يمكنك فقط سحب المقابض دون إضافة أي مفاتيح تعديل.
إقرأ أيضا:كيفية إنشاء نص مطلي بالرش في Photoshopكيفية تغيير حجم النص في Photoshop CS6
ولكن في CS6 ، تحتاج إلى الضغط مع الاستمرار على مفتاح Shift أثناء سحب المقابض لقفل نسبة العرض إلى الارتفاع في مكانها. وعندما تنتهي من تغيير حجم النص ، تأكد من تحرير زر الماوس قبل تحرير مفتاح Shift.
كيفية نقل النص إلى وسط المستند
بمجرد تغيير حجم النص ، انقله إلى وسط اللوحة عن طريق النقر داخل مربع التحويل الحر وسحب النص إلى موضعه.
عند الانتهاء ، اضغط على Enter (Win) / Return (Mac) على لوحة المفاتيح لإغلاق Free Transform:
![]()
الخطوة 8: قم بعمل نسخة من طبقة الكتابة
الآن بعد أن أضفنا النص ، نحن على استعداد لبدء تحويل الأحرف إلى ذهب.
في لوحة Layers ، قم بعمل نسخة من طبقة Type عن طريق سحبها لأسفل إلى أيقونة Add New Layer في الأسفل:
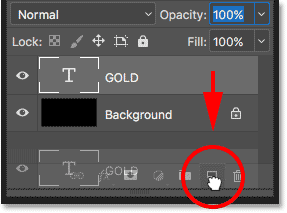
تظهر نسخة من طبقة Type فوق النسخة الأصلية:
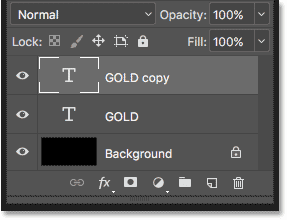
الخطوة 9: قم بتلوين النص بتأثير طبقة متدرجة تراكب
لتحويل النص إلى ذهب ، سنستخدم تأثيرات الطبقات في Photoshop. وأول تأثير نحتاجه هو تراكب التدرج. سنستخدمه لإضافة بعض الألوان الذهبية إلى الحروف.
لا يزال في لوحة الطبقات ، تأكد من تحديد طبقة “نسخة الذهب”. ثم انقر فوق رمز Layer Styles (رمز “fx”) في الأسفل:
![]()
وفي قائمة تأثيرات الطبقة ، اختر Gradient Overlay :
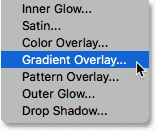
الخطوة 10: إنشاء تدرج ذهبي مخصص
يفتح Photoshop شاشة Layer Style المعينة على خيارات Gradient Overlay.
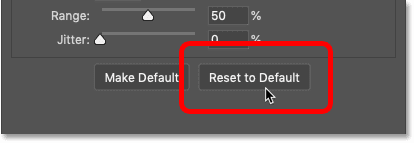
أولاً ، امسح أي إعدادات سابقة ربما استخدمتها بالنقر فوق الزر ” إعادة التعيين إلى الافتراضي” :
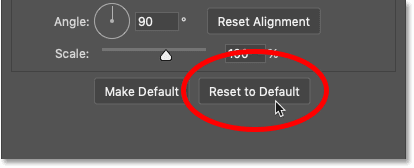
ثم قم بتحرير ألوان التدرج بالنقر فوق حامل التدرج اللوني :
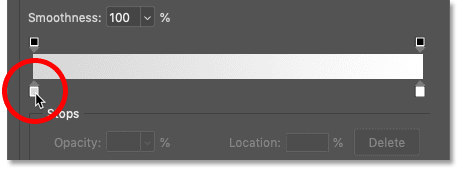
في محرر التدرج اللوني ، انقر نقرًا مزدوجًا فوق توقف اللون أسفل الجانب الأيسر من التدرج اللوني :
إضافة ألوان الذهب المتدرجة
سنقوم بإنشاء تدرج ذهبي مخصص للنص. ولمساعدتنا ، أخذت عينات من الألوان من صورة لعملة ذهبية.
في لاقط اللون، تعيين R القيمة إلى 247 ، و G القيمة إلى 238 ، و B القيمة إلى 173 . ثم انقر فوق OK لإغلاق Color Picker:

بالعودة إلى محرر التدرجات اللونية ، انقر نقرًا مزدوجًا فوق التوقف اللوني أسفل الجانب الأيمن من التدرج اللوني :

وفي Color Picker ، اضبط R على 193 ، و G إلى 172 و B إلى 81 . ثم انقر فوق “موافق”:

الخطوة 11: احفظ تدرج الذهب كإعداد مسبق
ستحتاج إلى هذا التدرج مرة أخرى ، لذا احفظه كإعداد مسبق.
في محرر التدرجات اللونية ، قم بتسمية التدرج “ذهبي” ، ثم انقر فوق الزر ” جديد” لحفظه:
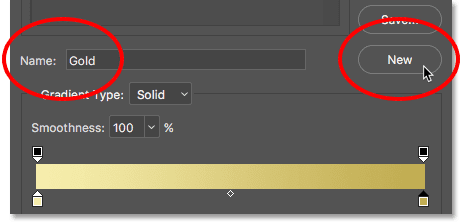
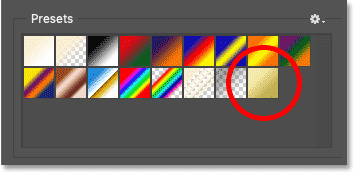
تظهر صورة مصغرة للتدرج اللوني الذهبي في منطقة الإعدادات المسبقة :
انقر فوق “موافق” لإغلاق محرر التدرج ، لكن اترك مربع حوار نمط الطبقة مفتوحًا.
هذا هو النص مع تطبيق التدرج الذهبي:

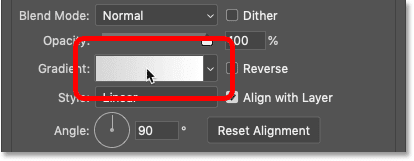
الخطوة 12: قم بتغيير نمط التدرج إلى انعكاس
مرة أخرى في مربع الحوار Layer Style ، قم بتغيير نمط التدرج اللوني إلى Reflected :
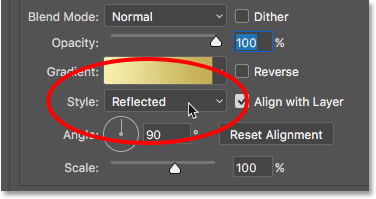
يؤدي هذا إلى نقل اللون الذهبي الغامق إلى أعلى وأسفل النص ، مع مرور اللون الأفتح في المنتصف:

الخطوة 13: أضف تأثير طبقة Bevel & Emboss
يوجد على يسار مربع الحوار Layer Style قائمة بكل تأثيرات الطبقة التي يمكننا الاختيار من بينها.
حدد Bevel & Emboss بالنقر مباشرة على اسم التأثير:
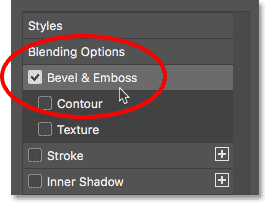
ثم امسح أي إعدادات مخصصة سابقة بالنقر فوق الزر ” إعادة التعيين إلى الافتراضي” :
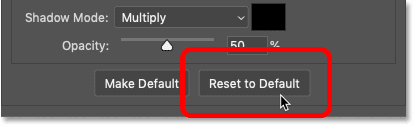
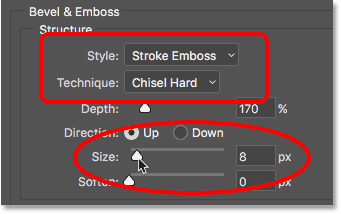
الخطوة 14: قم بتغيير الأسلوب إلى إزميل صعب
في قسم الهيكل ، تأكد من ضبط النمط على شطبة داخلية .
ثم قم بتغيير التقنية إلى Chisel Hard :
الخطوة 15: قم بتغيير Gloss Contour إلى Ring – Double
في قسم التظليل ، انقر فوق السهم الصغير الموجود على يمين الصورة المصغرة لمعان المحيط . تأكد من النقر فوق السهم وليس الصورة المصغرة.
ثم انقر نقرًا مزدوجًا فوق Ring – Double contour لتحديده (الصورة المصغرة الثالثة من الصف الأيمن والأيسر):

الخطوة 16: قم بتغيير الزاوية وقم بتشغيل Anti-Aliasing
لا يزال في قسم التظليل ، اضبط الزاوية على 120 درجة .
ثم قم بتشغيل خيار Anti-aliased لتنعيم أي حواف خشنة:

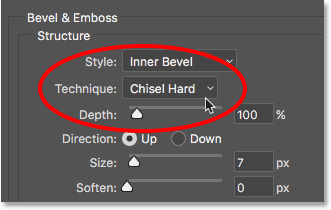
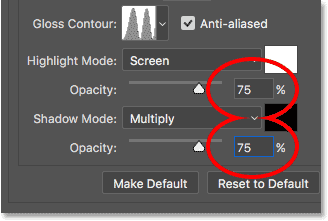
الخطوة 17: اضبط Highlight and Shadow Opacity على 75٪
لإضافة المزيد من التباين إلى التأثير ، قم بزيادة كل من Highlight Opacity و Shadow Opacity إلى 75٪ :
وإليك التأثير حتى الآن:

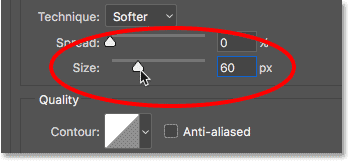
الخطوة 18: قم بزيادة قيمة الحجم لملء الحروف
لجعل النص يبدو أشبه بالذهب الخالص ، أغلق المساحة الموجودة داخل الحروف عن طريق زيادة حجم تأثير Bevel and Emboss.
أسهل طريقة للقيام بذلك هي النقر أولاً داخل مربع قيمة الحجم لتنشيطه. ثم استخدم مفتاح السهم لأعلى على لوحة المفاتيح لزيادة القيمة ببطء. أثناء قيامك بذلك ، سترى الحروف تملأ من الحواف الخارجية باتجاه الوسط.
تعتمد قيمة الحجم التي تحتاجها على حجم النص الخاص بك. بالنسبة لي ، تؤدي قيمة 41 بكسل المهمة:
![]()
وإليكم تأثير الذهب مع ملء الأحرف:
الخطوة 19: قم بزيادة قيمة العمق
بعد ذلك ، قم بزيادة قيمة العمق عن طريق سحب شريط التمرير نحو اليمين. سيؤدي ذلك إلى تحسين الإضاءة وإضافة المزيد من التباين إلى الانعكاس في الحروف. سأضبط قيمة العمق على حوالي 170٪ :
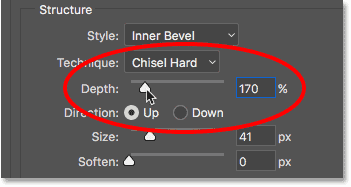
والآن بدأت الحروف تبدو مثل الذهب:

الخطوة 20: أضف تأثير طبقة التوهج الداخلي
أضف تأثير طبقة Inner Glow بالنقر فوق اسمها على يسار مربع الحوار Layer Style:

ثم امسح أي إعدادات سابقة بالنقر فوق إعادة التعيين إلى الافتراضي :
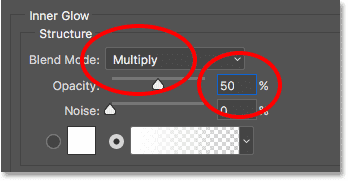
تغيير وضع المزج للتوهج الداخلي من الشاشة إلى الضرب .
واضبط التعتيم على 50٪ :
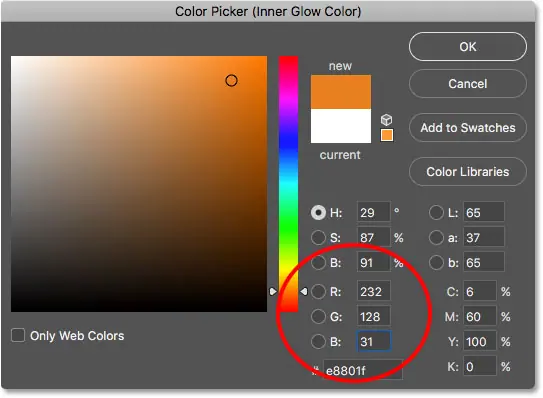
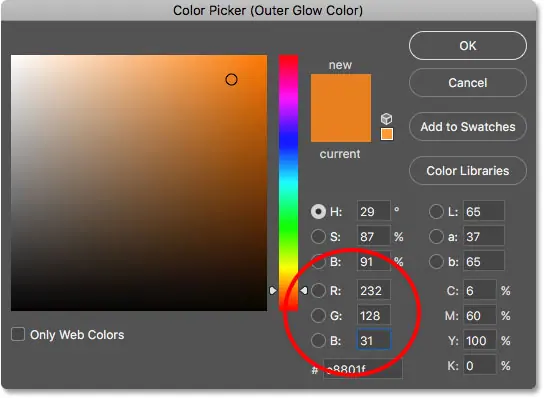
بعد ذلك ، قم بتغيير لون التوهج بالنقر فوق حامل اللون :

وفي Color Picker ، اختر ظلًا للبرتقالي عن طريق تعيين قيمة R إلى 232 و G إلى 128 و B إلى 31 (أخذت عينة من هذا اللون من صورة لبنة ذهبية). ثم انقر فوق “موافق” في Color Picker:
أخيرًا ، قم بزيادة حجم التوهج حتى يملأ الحروف بالكامل. في حالتي ، سأضبط قيمة الحجم على 75 بكسل:

عند الانتهاء ، انقر فوق OK لإغلاق مربع الحوار Layer Style.
يجب أن يبدو تأثير الذهب الآن مشابهًا لهذا:

الخطوة 21: حدد طبقة الكتابة الأصلية
مرة أخرى في لوحة Layers ، انقر فوق طبقة Type الأصلية لتحديدها:

الخطوة 22: قم بإضافة خط حول الحروف
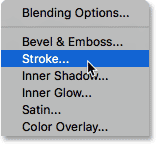
ثم انقر فوق رمز Layer Styles في الأسفل:
![]()
وهذه المرة ، اختر Stroke :
في مربع الحوار Layer Style ، انقر فوق الزر Reset to Default لمسح أي إعدادات Stroke سابقة:

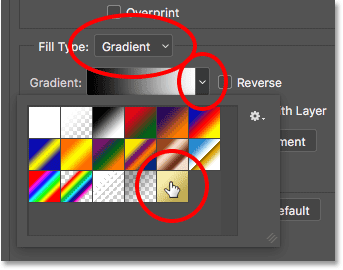
الخطوة 23: املأ الحد باستخدام الإعداد المسبق للتدرج الذهبي
قم بتغيير نوع التعبئة للحد من اللون إلى التدرج اللوني .
ثم انقر فوق السهم الصغير الموجود على يمين حامل التدرج وحدد التدرج “الذهبي” الذي حفظناه سابقًا عن طريق النقر المزدوج على الصورة المصغرة له:
الخطوة 24: اضبط نمط الخط وموضعه وحجمه
قم بتغيير نمط التدرج اللوني من الخطي إلى المنعكس .
ثم تعيين الوظيفة من السكتة الدماغية إلى خارج وزيادة الحجم إلى حوالي 8 بكسل :

والآن لدينا حد حول النص تم تعيينه على نفس ألوان النص نفسه:

الخطوة 25: قم بتطبيق Bevel & Emboss على السكتة الدماغية
سنقوم بتطبيق تأثير Bevel & Emboss آخر ، ليس على الحروف ولكن على الحد.
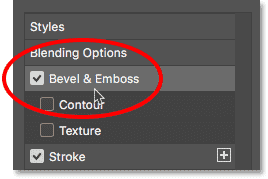
انقر فوق الكلمات Bevel & Emboss الموجودة على يسار مربع الحوار Layer Style:
لا تنقر فوق إعادة التعيين إلى الافتراضي هذه المرة ، لأننا سنستخدم معظم الإعدادات نفسها كما في السابق.
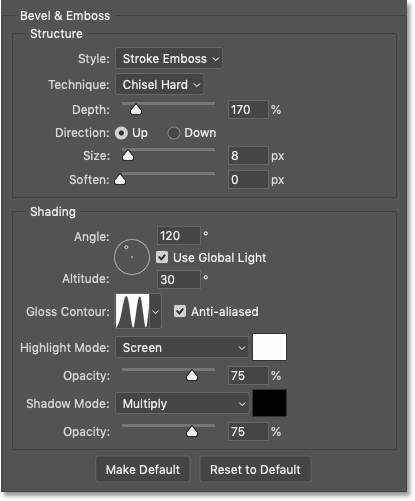
بدلاً من ذلك ، ما عليك سوى تغيير النمط من Inner Bevel إلى Stroke Emboss . و تقنية يجب تعيين الحفر الصلب .
اضبط قيمة الحجم على نفس الحجم الذي اخترته للحد ، والذي كان في حالتي 8 بكسل :
تحقق مرة أخرى من إعدادات Bevel & Emboss الأخرى
تأكد من أن جميع إعدادات Bevel & Emboss الأخرى هي نفسها كما كانت من قبل. إذا لم تكن كذلك لسبب ما ، فستحتاج إلى تغييرها:
العمق: 170٪
الزاوية: 120 درجة
محيط اللمعان:
حلقة- مزدوج مضاد للتعرج: التحقق من
تعتيم التظليل: 75٪
عتامة الظل: 75٪
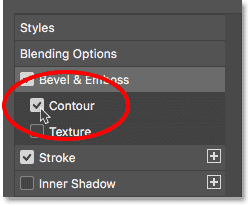
تشغيل خيار كونتور
أسفل Bevel & Emboss على يسار مربع الحوار Layer Style يوجد تأثير يسمى Contour . انقر داخل مربع الاختيار لتشغيله.
سيؤدي ذلك إلى زيادة تحسين الإضاءة حول السكتة الدماغية:
وإليك ما يبدو عليه النص الذهبي الآن مع تطبيق Bevel & Emboss على الحد:

الخطوة 26: تطبيق تأثير طبقة التوهج الخارجي
لننهي أنماط الطبقات الخاصة بنا عن طريق إضافة توهج خافت حول النص ، كما لو كان الضوء ينعكس عن الأحرف الذهبية.
انقر مباشرة فوق الكلمات Outer Glow على يسار مربع الحوار Layer Style:

اضبط عتامة التوهج على 40٪ ، ثم انقر فوق عينة اللون :

في Color Picker ، اضبط قيمة R على 232 ، و G إلى 128 و B إلى 31 ، ثم انقر فوق OK:
وأخيرًا ، قم بزيادة حجم التوهج إلى حوالي 60 بكسل :
لقد انتهينا من تأثيرات الطبقة الخاصة بنا ، لذا انقر فوق موافق لإغلاق مربع الحوار Layer Style.
وإليك تأثير النص الذهبي مع تطبيق جميع تأثيرات الطبقة ، بما في ذلك التوهج الخارجي الجديد:

الخطوة 27: حدد طبقة “نسخة الذهب”
سننهي تأثير النص الذهبي بإضافة بريق إلى الحروف. وللقيام بذلك ، سنحتاج إلى إضافة البريق على طبقتهم المنفصلة.
في لوحة الطبقات ، انقر فوق طبقة “نسخة الذهب” (الطبقة العليا) لتحديدها:

الخطوة 28: أضف طبقة جديدة فوق النص
ثم اضغط مع الاستمرار على مفتاح Alt (Win) / Option (Mac) على لوحة المفاتيح وانقر على أيقونة Add New Layer :
![]()
في مربع الحوار New Layer ، قم بتسمية الطبقة “Sparkles” وانقر فوق OK:

يضيف Photoshop طبقة فارغة جديدة تسمى “Sparkles” فوق النص:

الخطوة 29: حدد أداة الفرشاة
سنقوم بإنشاء البريق باستخدام إحدى فرش Photoshop.
حدد أداة الفرشاة من شريط الأدوات:

الخطوة 30: حدد فرشاة “Crosshatch 4” في مجموعة فرش متنوعة
الفرشاة التي نحتاجها للبريق ، “Crosshatch 4” ، مضمنة في Photoshop كجزء من مجموعة Assorted Brushes. لكن الفرش المتنوعة لا يتم تحميلها تلقائيًا ، لذلك سنحتاج إلى تحميل المجموعة بأنفسنا. وهذا يقودنا إلى اختلاف آخر بين Photoshop CC و CS6.
في Photoshop CC 2018 ، أعادت Adobe تصميم لوحات الفرشاة. لذا استخدم الخطوات أدناه لتحميل الفرشاة بناءً على إصدار Photoshop الخاص بك.
كيفية تحميل Assorted Brushes في Photoshop CC
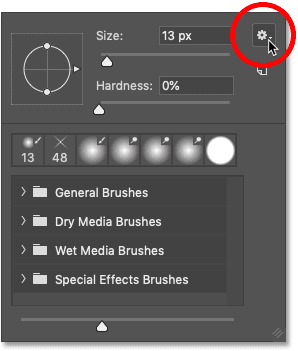
في Photoshop CC ، مع تحديد Brush Tool ، انقر بزر الماوس الأيمن (Win) / انقر مع الضغط على Control (Mac) داخل المستند لفتح Brush Preset Picker .
ثم انقر فوق رمز القائمة أعلى اليمين:
واختر Legacy Brushes من القائمة:
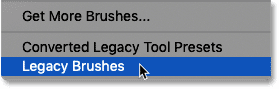
اختيار “Legacy Brushes”.
انقر فوق ” موافق” لتحميل مجموعة Legacy Brushes:

مرة أخرى في Brush Preset Picker ، قم بالتمرير لأسفل إلى مجلد Legacy Brushes الجديد وقم بفتحه:
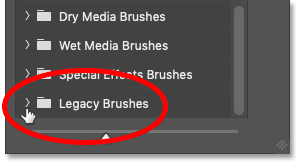
وداخل المجلد ، افتح مجلد Assorted Brushes :

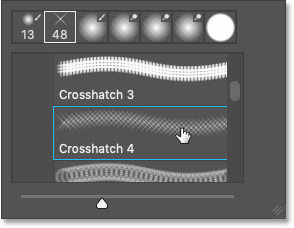
ثم قم بالتمرير لأسفل في قائمة الفرش المتنوعة حتى تجد فرشاة Crosshatch 4 .
انقر نقرًا مزدوجًا فوق الصورة المصغرة الخاصة بها لتحديد الفرشاة وإغلاق Brush Preset Picker:
كيفية تحميل Assorted Brushes في Photoshop CS6
في Photoshop CS6 ، مع تحديد Brush Tool ، انقر بزر الماوس الأيمن (Win) / انقر مع الضغط على Control (Mac) داخل المستند لفتح Brush Preset Picker .
ثم انقر فوق رمز القائمة أعلى اليمين:
![]()
واختر مجموعة فرش متنوعة من القائمة:

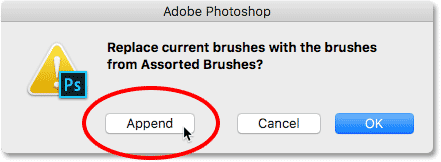
سيسألك Photoshop عما إذا كنت تريد استبدال فرشك الحالية بالفرش الجديدة. اختر Append لإضافتها إلى الفرش الموجودة:
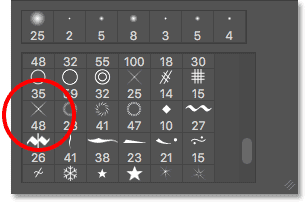
مرة أخرى في Brush Preset Picker ، قم بالتمرير لأسفل عبر الفرش حتى تجد فرشاة Crosshatch 4 ذات 48 بكسل . ابحث عن الفرشاة التي تبدو مثل “X” بالرقم 48 تحتها (48 يعني أن الحجم الافتراضي للفرشاة هو 48 بكسل).
انقر نقرًا مزدوجًا فوق الصورة المصغرة الخاصة بها لتحديد الفرشاة وإغلاق Brush Preset Picker:
الخطوة 31: اختبر لونًا ذهبيًا لاستخدامه في التألق
اختر لونًا للتألق عن طريق أخذ عينة من لون من النص.
اضغط مع الاستمرار على مفتاح Alt (Win) / Option (Mac) على لوحة المفاتيح للتبديل مؤقتًا من Brush Tool إلى أداة Eyedropper ، ثم انقر فوق لون ذهبي فاتح لاختباره.
سأختار منطقة مضيئة من الحرف “O”:

الخطوة 32: اضغط على الحروف لإضافة بريق عشوائي
حرر مفتاح Alt (Win) / Option (Mac) للعودة إلى أداة Brush Tool . ثم انقر فوق بضع نقاط عشوائية حول النص لإضافة بريق.
لمجموعة متنوعة المضافة، وتغيير حجم الفرشاة قبل كل نقرة عن طريق الضغط على اليسار أو مفاتيح قوس الصحيحة على لوحة المفاتيح. يجعل مفتاح القوس الأيسر الفرشاة أصغر ومفتاح القوس الأيمن يجعلها أكبر.
لا تضيف الكثير من البريق وإلا ستبالغ في ذلك. كل ما تحتاجه حقًا هو زوجان أكبر وأصغر. إذا كنت لا تحب التألق الأخير الذي أضفته ، فاضغط على Ctrl + Z (Win) / Command + Z (Mac) على لوحة المفاتيح للتراجع عنه ، ثم حاول مرة أخرى.
هنا ، أضفت بريقين إلى الحرف “G” ، وثالثًا ، بريق أصغر أسفل الحرف “L” ، ورابعًا في أعلى يسار الحرف “D”:

الخطوة 33: خفض عتامة البريق (اختياري)
وأخيرًا ، إذا كان البريق يبدو ساطعًا جدًا ، فقم ببساطة بتقليل عتامة طبقة “Sparkles”.
ستجد خيار Opacity في الجزء العلوي الأيمن من لوحة Layers. سأخفض خاصتي إلى 80٪ :
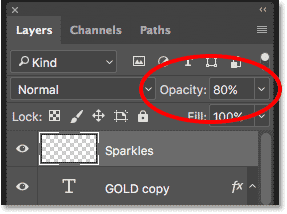
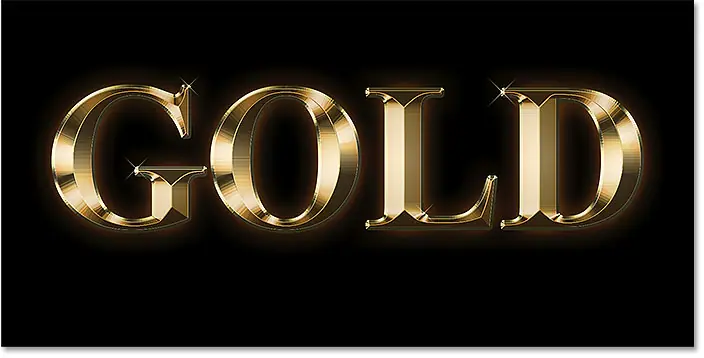
وبهذا ، انتهينا! هنا ، بعد خفض عتامة طبقة “Sparkles” ، يظهر تأثير النص الذهبي النهائي: