

Recycle water cans
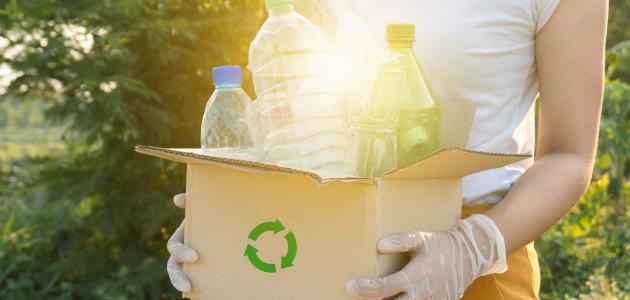
Individuals use plastic water bottles to a large extent, and they are often thrown in the trash when they are finished, but they can be recycled and used so as not to negatively affect the environment. When it is recycled, the amount of waste and the spaces used to collect waste are reduced, and thus the percentage of air and water pollution resulting from the process of burying plastic for disposal is reduced, and it reduces the amount of gas emissions that cause global warming, and the process of recycling plastic consumes less energy than the process of manufacturing it; Which helps to conserve energy sources.
Ideas for how to recycle water bottles
There are many useful things that can be made from water bottles, including:
Making containers for growing roses
- Required materials and tools:
- Empty plastic water bottles.
- soil.
- knife.
- plastic eyes.
- gloves.
- Colorful fleece balls.
- scalpel.
- Khaitan burlap.
- glue.
- a nail.
- Small rose seedlings.
- Action Steps:
- It is preferable to wear gloves to protect hands before starting work.
- Cut the plastic bottle in the middle using a scalpel, and take the bottom part to make containers.
- Three holes were made at the bottom of the bottles. To drain excess water when watering roses.
- Cover the bottle with glue, and start the process of wrapping the burlap twine around it, starting from top to bottom, and it is better not to cover the base with string,
- Paste the plastic eyes and the woolen ball over the threads using glue; To make a face for the bottles, and leave it until the glue dries well.
- Fill the containers with soil up to the middle, and then put the rose seedlings inside them, and then add a little soil on them, and thus it is ready for watering.
Make a floating turtle
- Required materials and tools:
- An empty two-liter plastic bottle.
- foam paper.
- strings.
- button.
- a pair of scissors.
- Silicone and silicone gun.
- calligrapher.
- pencil.
- scalpel.
- needle.
- Action Steps:
- Cut the bottom of the bottle using the scalpel. To make a turtle shell.
- Place the cut part of the bottle on a foam sheet upside down, and then draw around it using a marker. The head, feet, and tail of the turtle are drawn around the bottle in proportion to its size.
- Cut the turtle body that was drawn on the foam sheet using scissors, and then paste the turtle shell on it using silicone and silicone gun.
- Adding some threads to the cochlea to give it a beautiful look, using needle and thread. So that the thread is passed from the bottom of the foam sheet to the top of the shell.
- Paste the button in the middle of the cochlea from the top using silicone and a silicone gun.
- Draw eyes, a mouth, and a nose on the turtle's head, and draw nails on its feet using a marker.
- Put the turtle in a bowl full of water and enjoy watching it float above the water.
Making cans to eat birds
- Required materials and tools:
- An empty plastic bottle with its cap on.
- scalpel.
- strong glue.
- Wooden sticks, ten to twenty-five centimeters long, and about half a centimeter thick.
- metal hanger
- drill bit;
- Bird food seeds.
- Action Steps:
- Clean and sterilize the plastic bottle from the inside and outside well, remove any labels from it, and dry it completely. So that the bird's food is not damaged when placed inside it.
- Install the metal hanger on the bottle cap, by making a hole in the middle of the cover and then inserting the hanger into it, making sure that it is well fixed, and then putting a little glue between the hanger and the cover to ensure its stability, and making sure that there is no glue in the places of opening and closing the cover ; So that it can be opened and closed to add food.
- Make holes in the bottom of the bottle so that they are about two to three centimeters away from the base of the bottle; To place the wooden sticks inside, leaving a distance between five to seven centimeters between each hole and the other on the same side, and making sure to make every two opposite holes so that the sticks pass through them, and then insert the sticks inside.
- To make food outlets, an oval-shaped hole about half a centimeter wide is made above each hole, with a distance of two to five centimeters.
- Fill the bottle with seeds and bird food, and then hang the box on tree branches outside so that the birds can feed on it.
Make a chair
- Required materials and tools:
- Thirty-eight two-liter plastic bottles.
- Sticky tape.
- foam.
- fabric.
- thread.
- cartoon.
- a pair of scissors.
- needle.
- ruler.
- calligrapher.
- Action Steps:
- Take a bottle and cut the upper part of it and get rid of it, then bring a second bottle and insert it inside the first bottle from the upper side that has the cap, so that the two bottles become as one piece with two identical bases, and its length is approximately fifty-five centimeters.
- Apply the previous step to all remaining plastic bottles; So that nineteen complete pieces are made.
- Making the base of the chair, by placing a piece in the middle, and then placing six pieces around it to make a hexagonal shape, and then fixing them together using adhesive tape; To make a solid and stable center for the chair, and then place the rest of the pieces around it and secure them together with adhesive tape, and be careful to maintain the hexagonal shape while placing the pieces.
- Cut two panels of cardboard in a hexagonal shape, so that they cover the base of the chair, and the correct measurements can be taken by placing the base on the cardboard and then drawing around it using a marker and cutting it using scissors, and then cutting a hexagonal foam board of the same size as the hexagonal board that was cut from the cardboard in the same way .
- Paste the base of the chair with hexagonal cardboard panels using adhesive tape; So that a cardboard board is placed below the base of the chair, and the other board is on top of it.
- Paste the hexagonal foam board over the cardboard board at the top of the base.
- Cut two pieces in a hexagonal shape from the fabric so that they are sufficient to cover the chair from the top and bottom, and then cut a piece of approximately sixty-one centimeters long to cover the circumference of the chair, and then sew the fabric parts together and cover the chair with it.


