
Using the Crop tool in Photoshop
How to add more fabric using the Crop Tool
Step 1: Convert the background layer to a normal layer
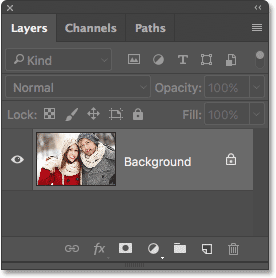
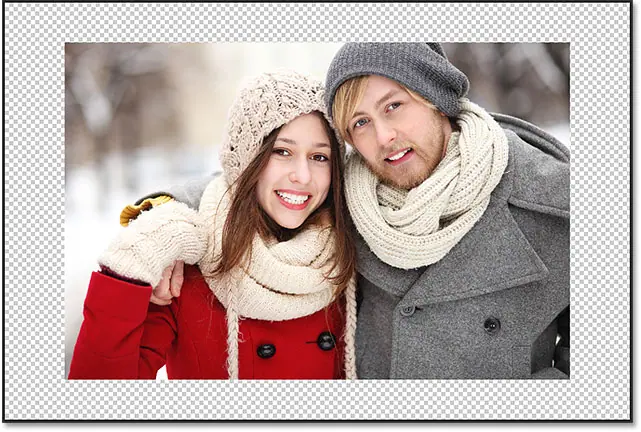
With our newly opened image in Photoshop, if we look at Layers panel , we will find the image sitting on background layer , which is currently the only class in our document:
Before we add more canvas area around the image, the first thing we need to do is convert the background layer to a normal layer. The reason is that we want the extra space to appear on its own separate layer Down image, but Photoshop doesn't allow us to layer it down background layer . The easy solution is to simply convert the background layer to a regular layer.
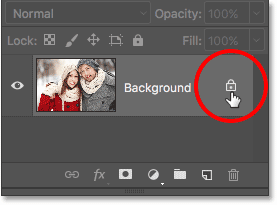
To do this, in Photoshop CC, all we need to do is click on lock icon The small one to the right of the background layer name:
If you are using Photoshop CS6 or earlier (this also works in CC), press and hold the key Alt (Win) / Option (Mac) on the keyboard and click double tap On the name "Background":
Read also:How to resize images for printing using Photoshop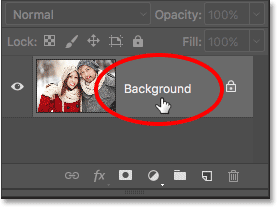
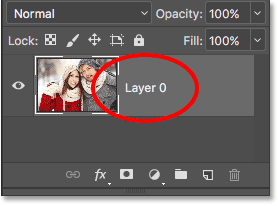
The background layer is immediately converted to a regular layer and renamed "Layer 0":
Understanding layers in Photoshop
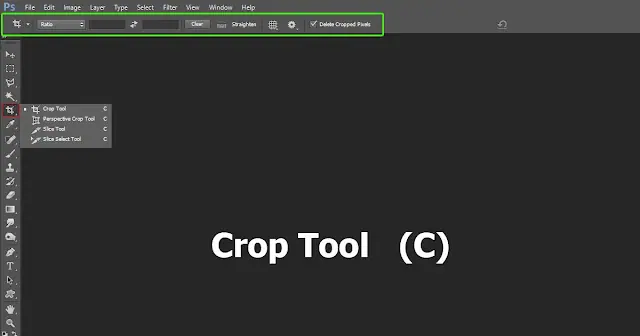
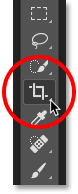
Step 2: Select the Crop tool
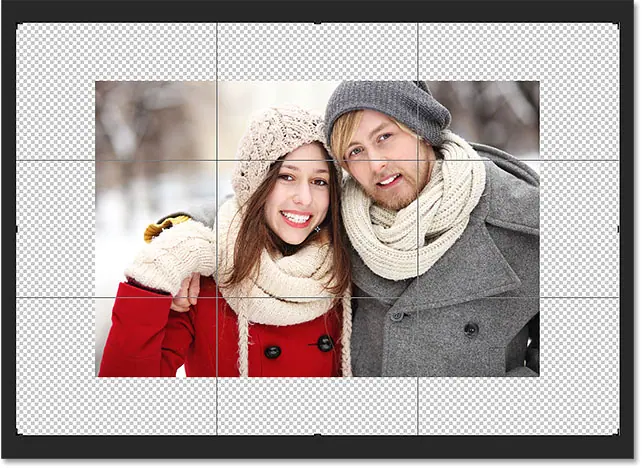
Now that we've solved this little problem, let's learn how to add extra space around the image. Select the Crop Tool from the toolbar along the left of the screen. You can also select the Crop Tool by clicking on the letter C On the keyboard:
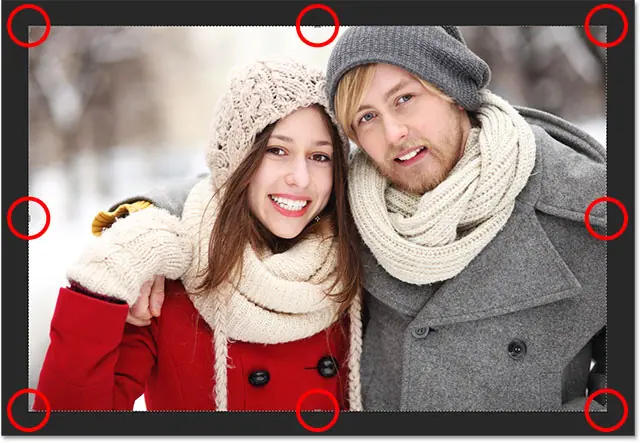
With the Crop Tool selected, Photoshop places a default stroke to crop About the photo, along with knobs above, below, left, and right of the boundary, and one in each corner. We'll use these handles to resize the crop borders and add additional canvas space:
Step 3: Drag the handles to resize the crop borders
To add extra space around the image, all we need to do is click on the handles and drag them out. Photoshop will then scale the canvas to match the new size of the cropping stroke.
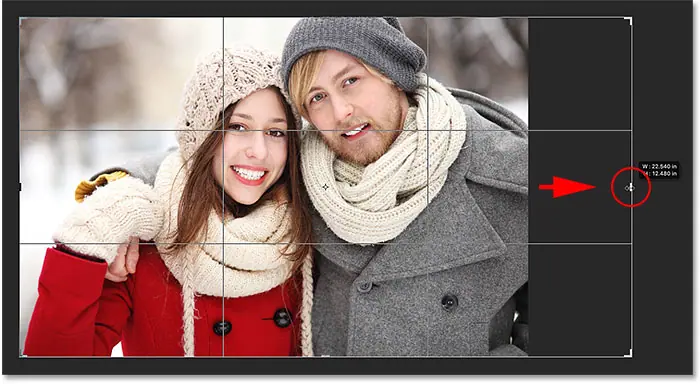
Read also:Navigate through images quickly using Birds Eye View in PhotoshopFor example, if I wanted to add an area on the right side of the image, I'd hit Right handle and drag it to the right, away from the image:
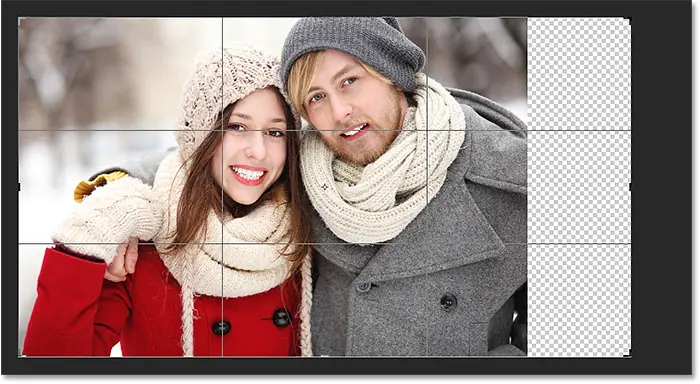
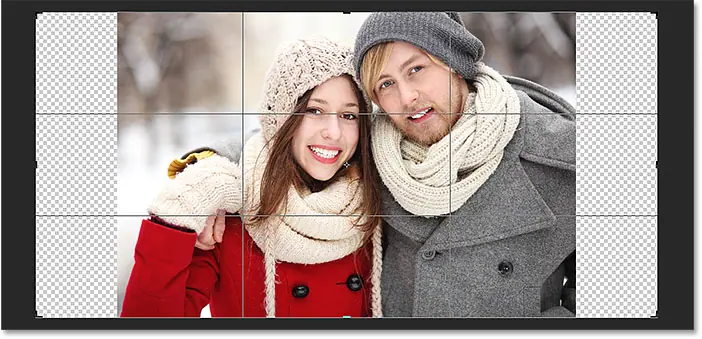
When I release the mouse button, Photoshop adds an extra space And fill it in a checkerboard pattern . The checkerboard pattern is how Photoshop represents it for transparency , which means that the extra space is currently empty. We'll fix that in a few moments:
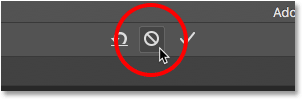
Instead of cropping now, let's look at how to add space around the rest of the image, along with some important keyboard shortcuts. I will cancel my crop and reset the boundaries of my crop by pressing a button إلغاء in Options bar . You can also cancel cropping by pressing a key I With the keyboard:
To add more space on the left side of the image, click left handle and drag it towards the left. or to add equal area on side Image at the same time, press and hold a key Alt (Win) / Option (Mac) While clicking and dragging either the left or right handle. This will resize the cropping strokes from the center, causing the handle on the other side to move at the same time, in the opposite direction:
Read also:How to create a selective coloring effect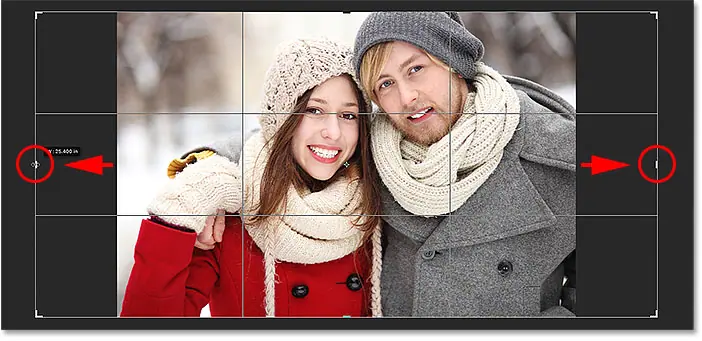
I'll release the mouse button, then I'll release Alt (Win) / Option (Mac), and now we see an equal amount of empty space on both sides of the image. Make sure to release the mouse button first, ثم Alt (Win) / Option (Mac) key, or this trick won't work:
We can also add extra space above and below the image. To add space above it, click and drag top handle up. To add space under it, click and drag bottom handle down.
Or, to add an equal amount of space above و Below the image at the same time, again press and hold Alt . key / (where) الخيار (Mac) key on the keyboard while dragging either the top or bottom handle. The opposite handle moves with it, in the opposite direction:
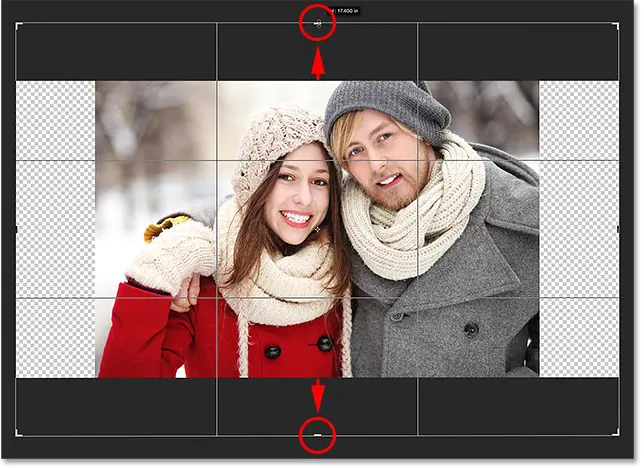
I'll release the mouse button, then I'll release the Alt (Win) / Option (Mac) key, and now I have an equal blank space above and below the image. Again, make sure to release the mouse button first, ثم key, otherwise it won't work:
Let's cancel the crop again by pressing a button إلغاء in the options bar, or by pressing a key I keyboard, so we can take a look at a more important keyboard shortcut:
Increase the canvas size
Maintain the original image aspect ratio
What if you want to keep the image's original aspect ratio while adding extra canvas space around it? For example, maybe you've already cropped the image to, say, 8 by 10, and now you want to keep the 8 by 10 proportion while adding the extra space.
To do this, press and hold shift+alt (Win) / Shift+Option (Mac) while dragging any of the corner handles out. Alt (Win) / Option (Mac) tells Photoshop to resize the cropping border from its center, while the Shift key tells it to lock the original aspect ratio in place.
Here, I'm holding the keys while pulling the corner left upper outward. Note that the four corners move together outwards:
I will release the mouse button, then I will release the Shift key and the Alt (Win) / Option (Mac) key (remember to release the mouse button قبل release keys). Photoshop adds the extra blank space around the entire image, while the aspect ratio remains the same as it was originally:
Increase the canvas size
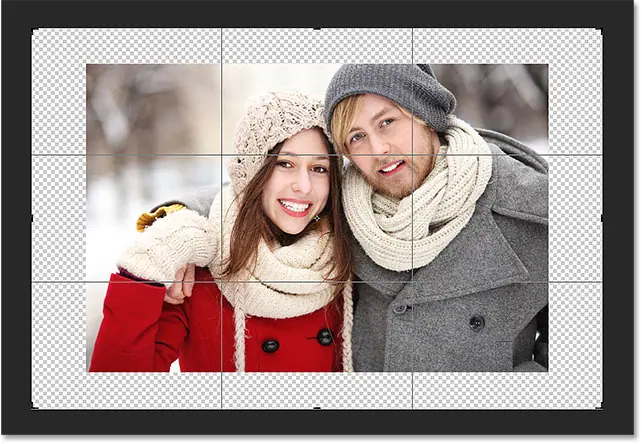
Step 4: Apply the crop
To apply the crop, tap check mark in the options bar, or tap Enter (Win) / Return (Mac) On the keyboard:
Photoshop "crops" the image, although in this case we did the opposite; lhave he added space with the crop tool instead of deleting it:
Increase the canvas size
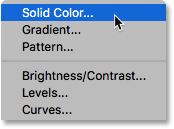
Step 5: Add a Solid Color Fill Layer
So far, so good. We've added extra canvas space. But for now, the space is empty. Let's turn it into a border of the image by filling it with color, and we'll do that using one of Photoshop's Solid Color Fill layers.
Click icon New Fill or Adjustment Layer Below the Layers panel:
![]()
Then choose Solid Color From the top menu that appears:
Photoshop will open Color picker Where we can choose a color for the border. The default color is black, but take your pick the White now. At the end of the tutorial, we'll learn how to customize the appearance of the border by choosing a color directly from the image:
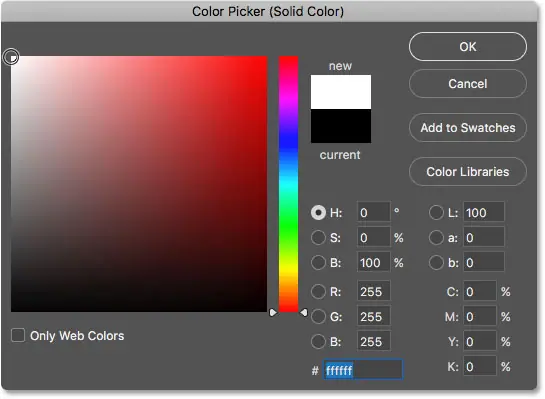
Click OK to close from the Color Picker. Photoshop temporarily fills the entire document with white, preventing the image from rendering. We'll fix this issue next:

Increase the canvas size
Step 6: Pull the fill layer under the spool
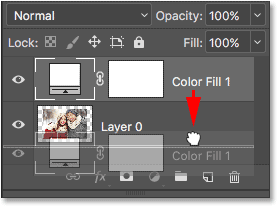
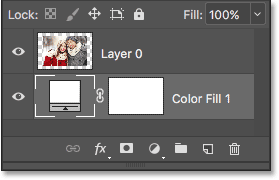
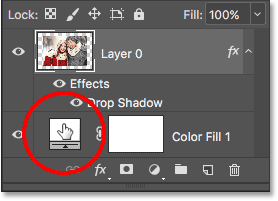
If we look at the Layers panel, we can see a solid color fill layer, named "Color Fill 1". We see that the reason our image is being prevented from displaying is because it is currently sitting above The image is on "Layer 0". Any layers appear above other layers in the Layers panel Before Those layers in the document:

We need to animate the fill layer Down the image in the Layers panel so that it appears behind image in the document. To do this, simply click on the fill layer and drag it down below "Layer 0". when you see highlighter tape Horizontal appears below “Layer 0”, release the mouse button:
Photoshop drops the fill layer into place below the image:
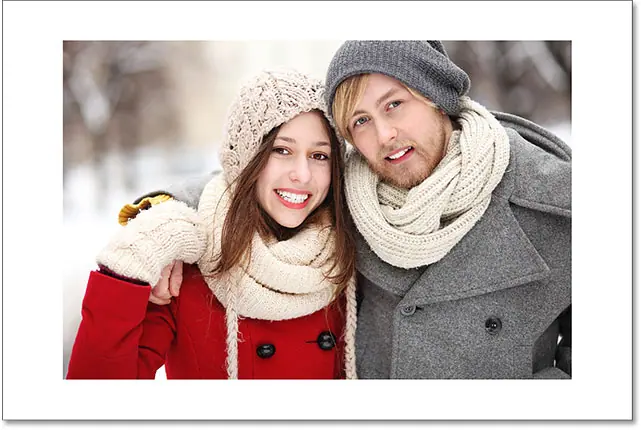
Now, the image appears in front of the document's white fill layer, creating the image border effect:
Increase the canvas size
Step 7: Select "Layer 0"
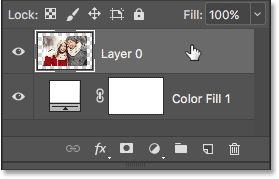
Now that we can see our image again, let's add a drop shadow to it. First, click on the image layer ( Layer 0) In the Layers panel to select it:
Increase the canvas size
Step 8: Add a drop shadow
Then, click on an icon Layer Styles (Code " fx ) at the bottom of the Layers panel:
![]()
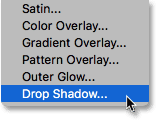
Choose Drop Shadow From the list that appears:
This opens a dialog box Layer Style in Photoshop Appointed On the Drop Shadow options in the middle column:
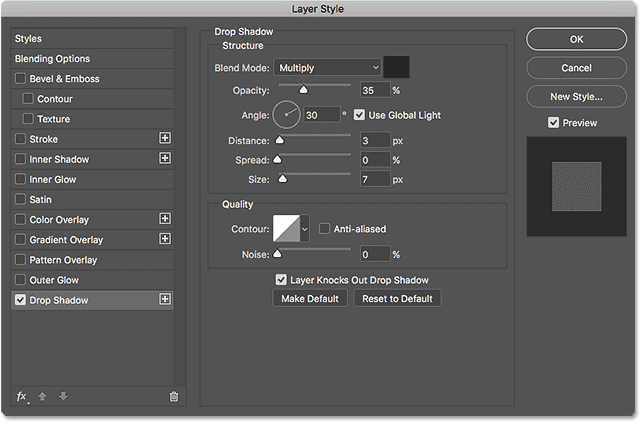
The first thing we usually want to do when adding a drop shadow is set the angle and distance of the shadow. we Can Do this by tuning corner و Diameter values directly in the dialog box. But the easiest way is to simply click on the image in the document, hold down the mouse button, and drag away from the image in the direction you want the shadow to fall. As you drag, the shadow will move with you.
Here, I've dragged the shadow away from the image a short distance toward the bottom right of the document:

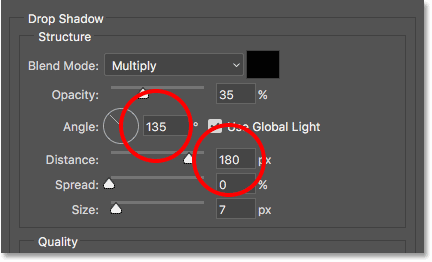
As you drag, you will see the angle and distance values update in the dialog. The exact angle and distance values you choose may differ from what I'm using here (the distance will depend largely on the size of your image), but to me, an angle of about 135 degrees and distance 180 pixels Good:
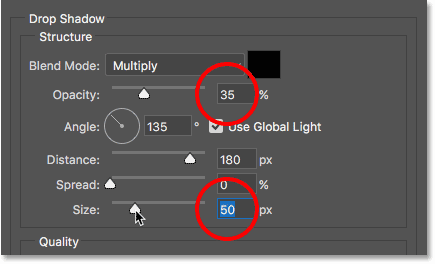
Once you set the angle and distance, soften the edges of the shadow by dragging a slider Size in the dialog box. The higher the value, the softer the shade will appear. Like the distance value, the size value you need will depend largely on the size of your image. For me, a value of about 50 pixels Well.
You can also control how light or dark the shadow appears by dragging a slider blackout , but I'll leave mine set to the default value of 35% :
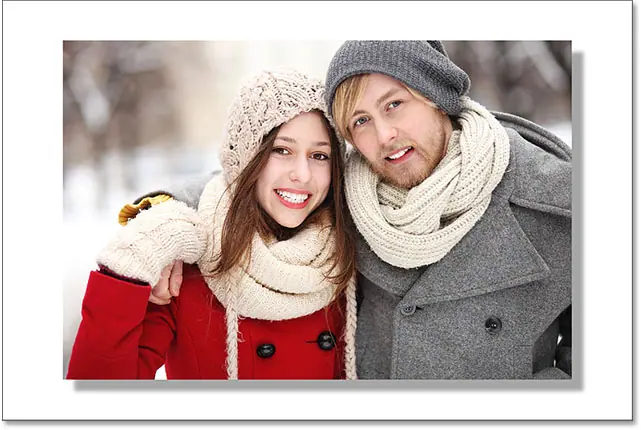
When you are satisfied with the results, click OK to close out of the Layer Style dialog box. Here is my result with the drop shadow applied:
Change border color
Finally, even though we set the border color to white, you can easily go back and change it to whatever color you want. In fact, you can even choose a color directly from the image itself.
To change the color, double-click color swatch Fill layer in the Layers panel:
This causes it to reopen Color picker In Photoshop:
If you know the exact color you want, you can select it in the Color Picker. Or, to choose a color directly from the image, simply hover your mouse pointer over the image. will turn your pointer to Password dropper . Click a color from the image to sample it and Photoshop will immediately set it as your new border color.
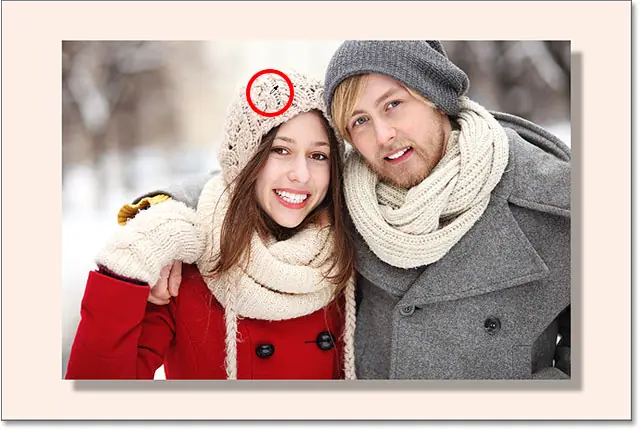
For example, I'll click on a spot in my guy's gray jacket (circled in yellow), and here, we see that my border color is now the same shade of gray:
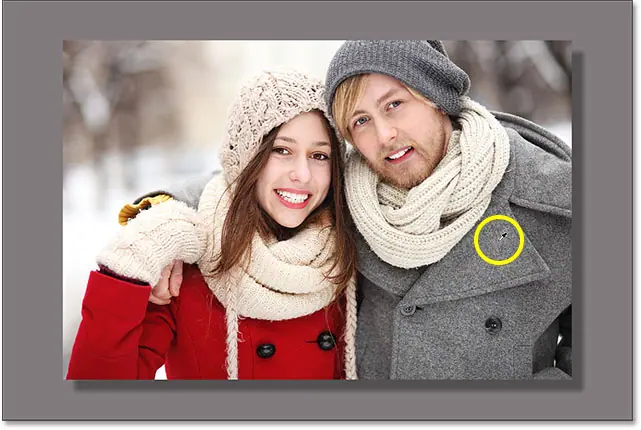
If you don't like the color, simply click on a different color in the image to sample it and try again. I'll click on the woman's hat this time, and Photoshop will immediately update the border color to match. When you are satisfied with the results, click OK to close from the Color Picker: