
Navigate through images quickly using Birds Eye View in Photoshop
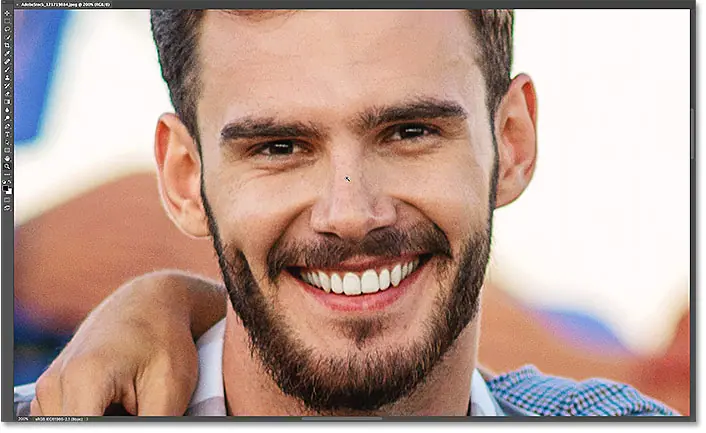
This is the image I opened in Photoshop
Zoom in for a closer look
To use Birds Eye View, we first need to zoom in on the image. To zoom in, we use the zoom tool. I'll choose the zoom tool from the toolbar:

Then, to zoom in, click a place within the image to take a closer look. Each time you click with the zoom tool, it will zoom in closer. I'm going to zoom in on the guy's face on the left, and here we see his face is now front and center in the document window:
How to use the bird's eye view
What if I want to stay at my current zoom level, but switch to a different person in the photo? Most people scroll or move the image using the hand tool in Photoshop, and there's nothing wrong with that. But there is a better and faster way to do this, and that is using a bird's eye view.
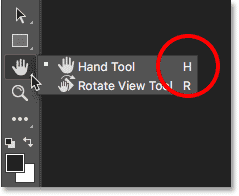
Although you don't need to select the hand tool to use the bird's eye view, you do not You need to know in keyboard shortcut . To find the keyboard shortcut, tap and hold the hand tool icon in the toolbar. The Hand tool is located just above the Zoom tool. By tapping and holding on the widget, a pop-up menu will open. Note that the Hand Tool has a keyboard shortcut H :
You can use Birds Eye View regardless of which gadget is currently active. To use Birds Eye View, press and hold the Hand tool shortcut ( H ) on the keyboard. Even if you already select the hand tool, still You need to press and hold "H". Then, while holding down the 'H' key, tap and hold on your photo. Photoshop instantly reduces the image to fit the entire screen, giving you a bird's eye view of where you are. You can release the "H" key by simply holding down the mouse button:

Bird's eye view rectangle
Notice Rectangular chart that appears around the hand tool pointer during a bird's eye view. The rectangle represents the document window. Surrounds the section of the image that fits in the document window at the current zoom level (ie the zoom level you were at before switching to bird's eye view). In my picture, the rectangle appears around the man's face. This is the area that was zoomed in a moment ago:
Read also:How to use Content-Aware Crop in Photoshop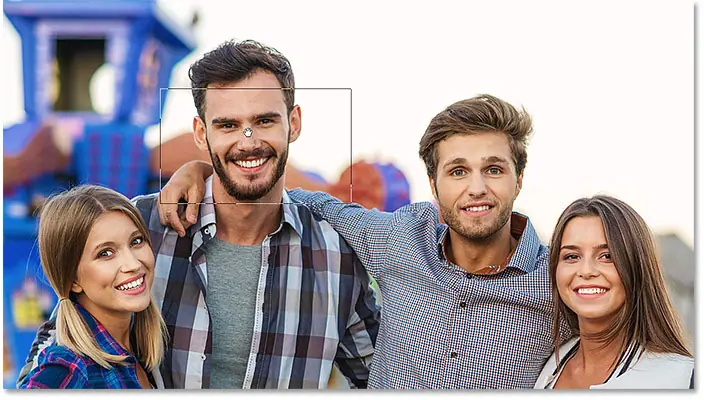
Choose a different area to zoom in
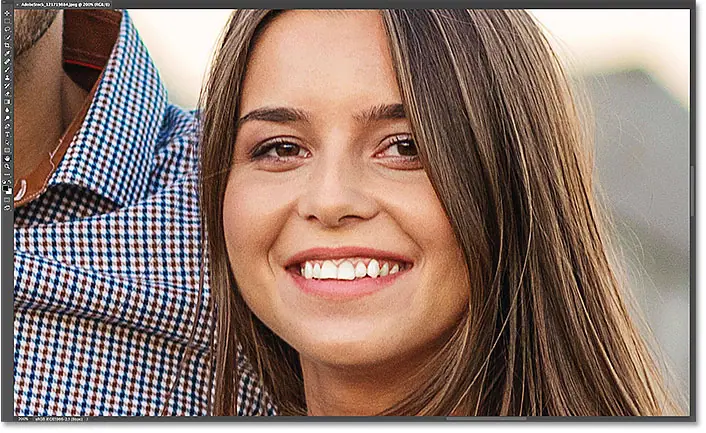
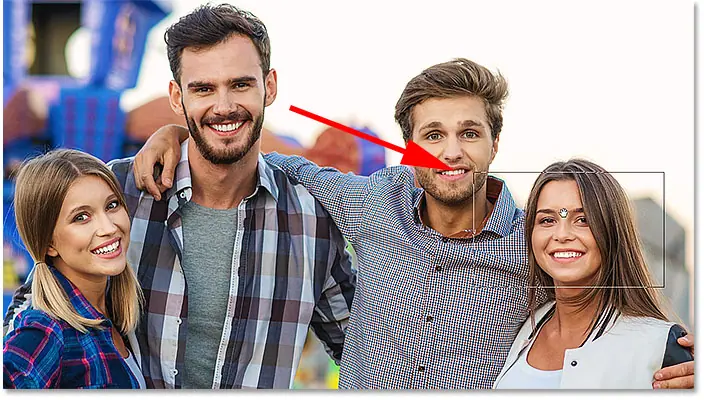
To zoom in on a different part of your image, hold the mouse button down and drag the rectangle to the new area you want to zoom in. In my case, I'm going to drag the rectangle over the woman's face at the far right:
Zoom in on the new area
To zoom in on the new area of Birds Eye View, just release the mouse button. When you do this, Photoshop immediately reverts the image to the same zoom level you were using before switching to Birds Eye View. The new area you have surrounded by the rectangle appears enlarged and centered on your screen. In my case, we see that Photoshop has now enlarged the woman's face. To cycle to a different area, again press and hold "H" on your keyboard, then press and hold the mouse button to switch to Birds Eye View. Drag the rectangle to a new location, then release the mouse button:
Read also:How to reset tools and toolbar