

How to add a rainbow to an image in Photoshop
Brighten up that stormy sky by learning how to add rainbows to your photo using Photoshop! Step by step tutorial for Photoshop CC 2020.
How to add a colorful, realistic rainbow to a photo using Photoshop. To create the rainbow we'll use one of Photoshop's built-in rainbow gradients. I'll show you where to find the gradient and how to load it into Photoshop. From there, you'll learn the quickest way to add a rainbow gradient to your image, and the easiest way to place the rainbow exactly where you want it. We'll blur the colors so they blend together more smoothly, and we'll hide the rainbow from areas Different using a layer mask. Finally we'll finish the tutorial by learning an advanced and easy way to combine rainbows with clouds!
How to add a colorful, realistic rainbow to a photo using Photoshop. To create the rainbow we'll use one of Photoshop's built-in rainbow gradients. I'll show you where to find the gradient and how to load it into Photoshop. From there, you'll learn the quickest way to add a rainbow gradient to your image, and the easiest way to place the rainbow exactly where you want it. We'll blur the colors so they blend together more smoothly, and we'll hide the rainbow from areas Different using a layer mask. Finally we'll finish the tutorial by learning an advanced and easy way to combine rainbows with clouds!
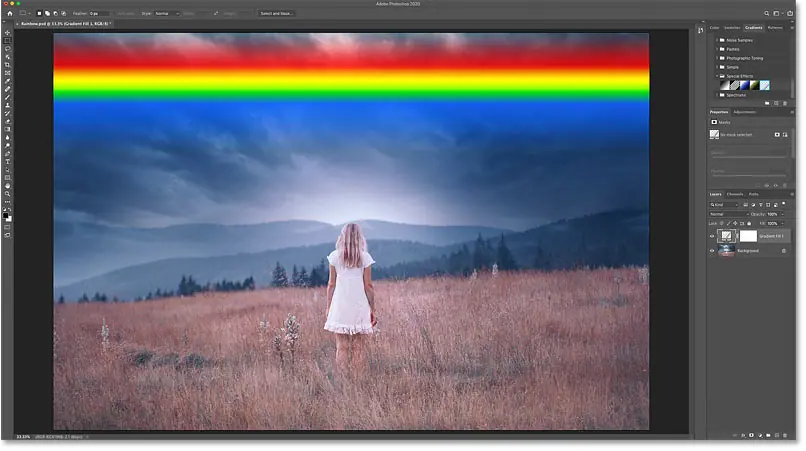
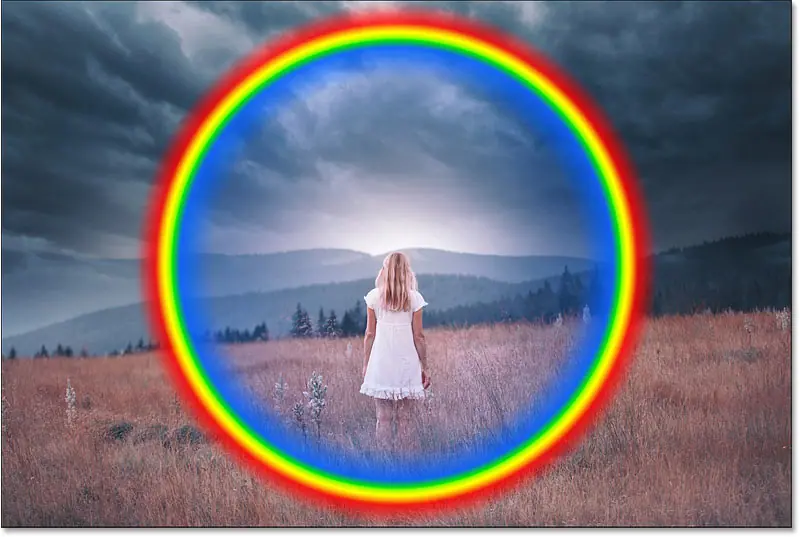
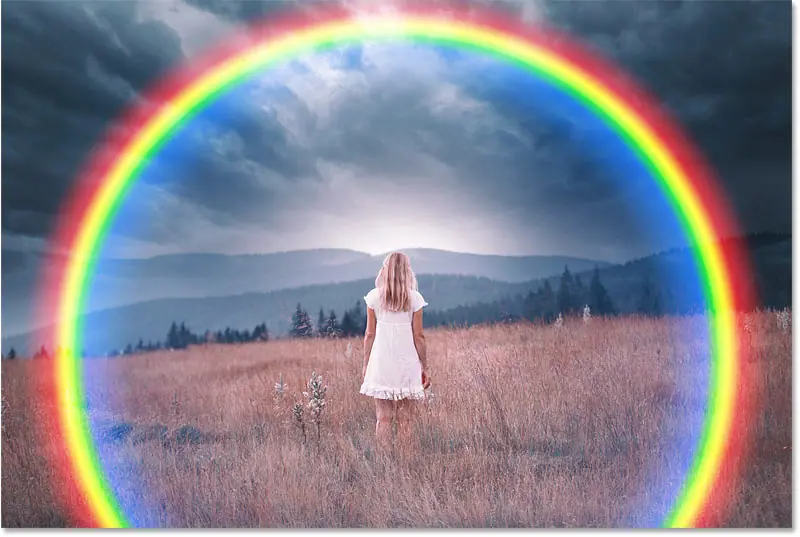
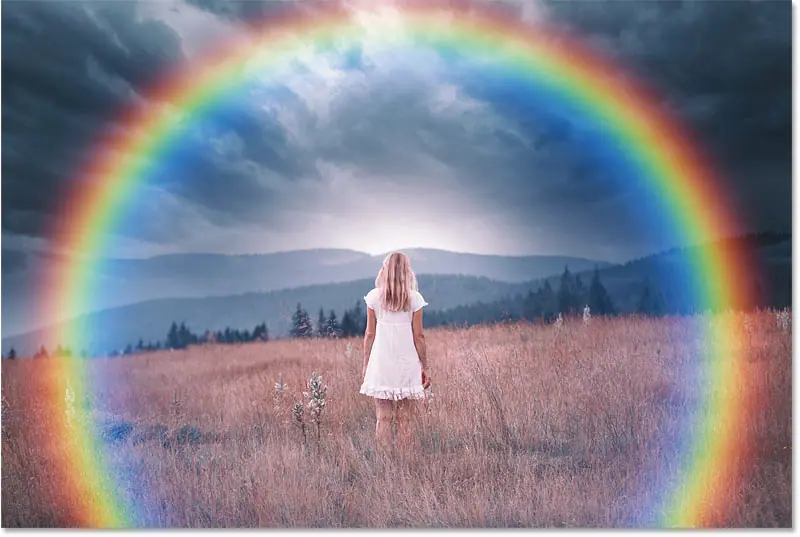
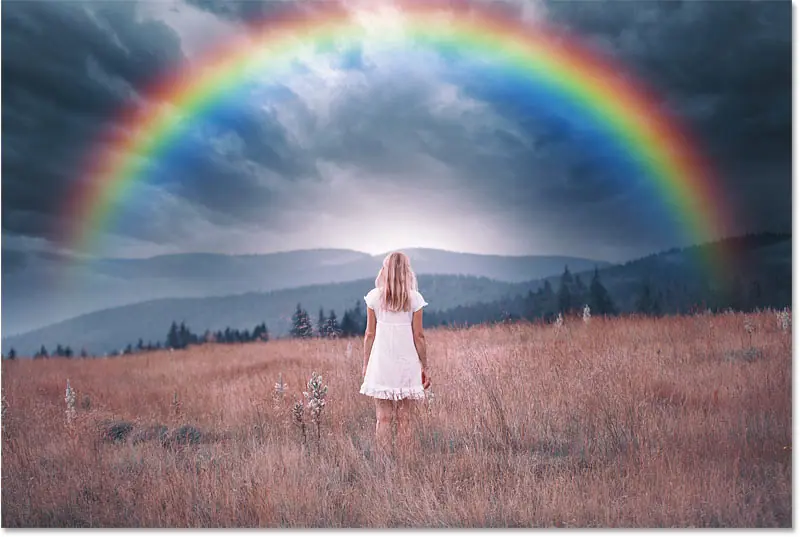
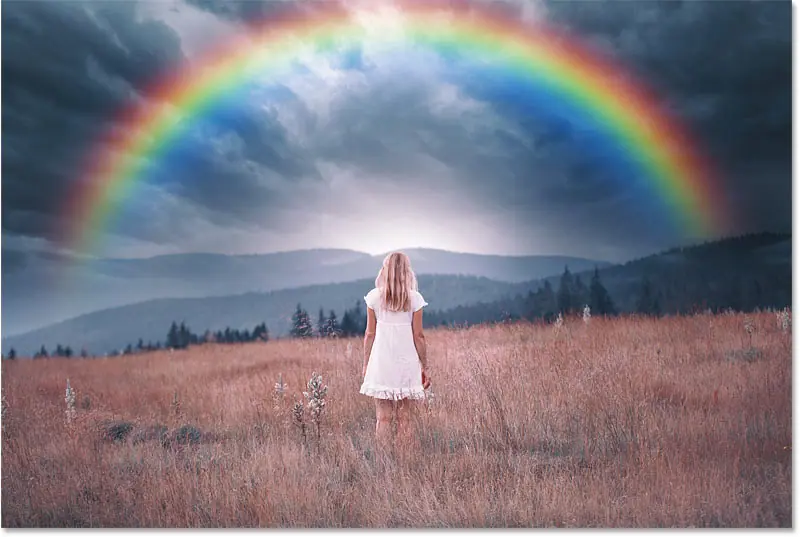
Here's an example of what the final rainbow effect will look like when you're done:
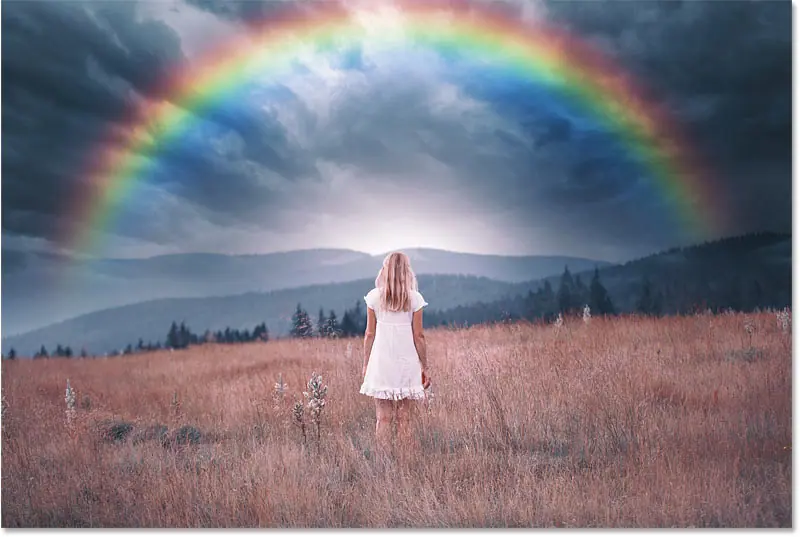
The ultimate rainbow effect.
Start by opening your image in Photoshop. I will use this image
The original picture. Credit: Adobe Stock.
Step 2: Open the Gradients panel
After that, open Gradient panel New as of Photoshop CC 2020.
The Gradients panel is in the same group of panels as the Color, Swatches, and Patterns panels:
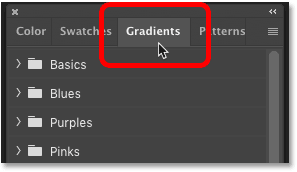
Open the Gradients panel.
Step 3: Upload the old gradients
To create the rainbow, we'll use one of Photoshop's built-in rainbow gradients.
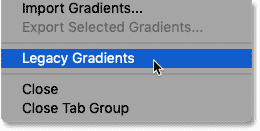
But as of Photoshop CC 2020, many of the old gradients in Photoshop, including the ones we need, have been moved to a group Legacy Gradients new. And before we can use the group, we first need to load it into Photoshop. If you already loaded the old gradients, you can skip to step 4.
In the Gradients panel, click menu icon In the upper right:
![]()
Click the menu icon.
Then choose Legacy Gradients From the list:
Download old gradients.
Step 4: Select the "Russell's Rainbow" gradient
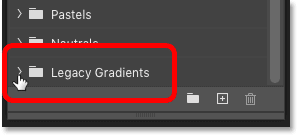
Scroll down to the bottom of the Gradients panel and open a group Legacy Gradients by clicking existing arrow To the left of the folder icon:
Open the Legacy Gradients folder.
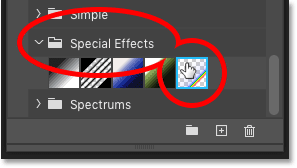
Then inside a group, scroll down to a group special effects .
Rotate the group and select Gradient Russell's rainbow from By clicking on its thumbnail:
Choose a "Russell's" rainbow gradient.
Step 5: Drag the gradient onto the image
Drag the gradient thumbnail from the Gradients panel and drop it onto your image:
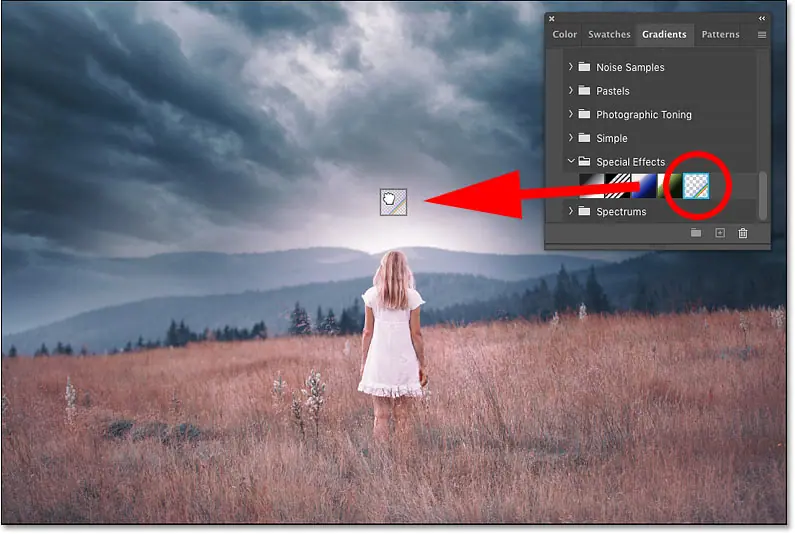
Drag and drop the "Russell" rainbow gradient.
A rainbow gradient appears horizontally across the top:
The result after adding the gradient.
Step 6: Open the Gradient Fill dialog
In the Layers panel, the gradient appears as Gradient fill layer top photo.
To edit the gradient shape Chromatic , double-click color swatch packing layer:
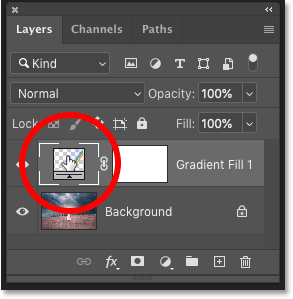
Double click on the color swatch.
This opens the dialog box Gradient fill :
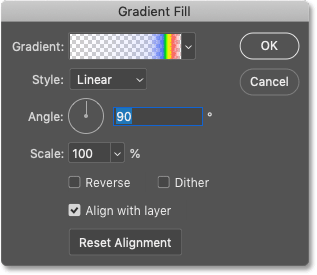
Photoshop's Gradient Fill dialog.
Step 7: Change the Gradient Style to Radial
In the dialog box, change style Gradient from Linear (default setting) to Radial :
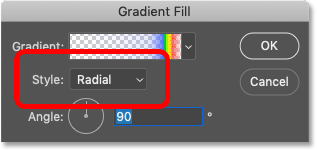
Change the Style option to Radial.
This gives the rainbow the circular shape we need:
The result after changing the gradient style to radial.
Step 8: Measure the size of the gradient
To change the size of the rainbow, click inside the square Scale to highlight the current value.
The default value is 100%:
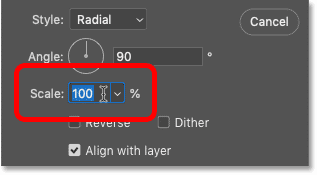
Click to highlight the scale value.
then use Up or Down arrow keys on the keyboard to increase or decrease the value. Hold down a key Shift While pressing the arrow keys to adjust the value in larger steps.
The exact size you need depends on your image and how big the rainbow is. In my case, I would increase the scale value to 143%:
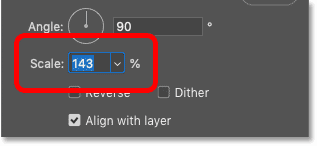
Increase the size of the scale.
At this value, the left and right sides of the rainbow extend almost to the edges of my image.
The top of the rainbow now extends beyond the image, but we'll fix that next:

The result after measuring the color gamut.
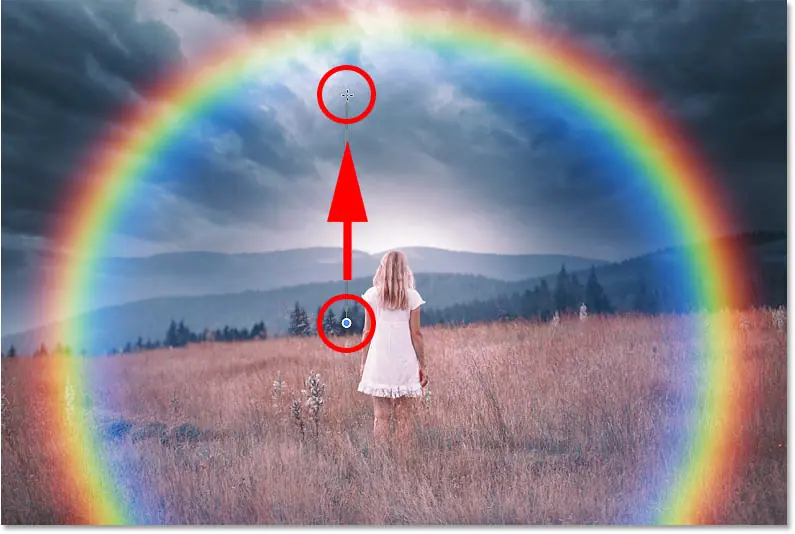
Step 9: Move the rainbow into place
With the Gradient Fill dialog still open, click on the image and drag the rainbow into position. To make it easier to move the gradient straight up or down, hold down a key Shift during withdrawal.
I'm going to drag the gradient straight down so that the top part of the rainbow is visible. Note that you may need to go back and forth between moving the gradient and adjusting the scale value in order to get things right.
When done, click OK to close the Gradient Fill dialog:
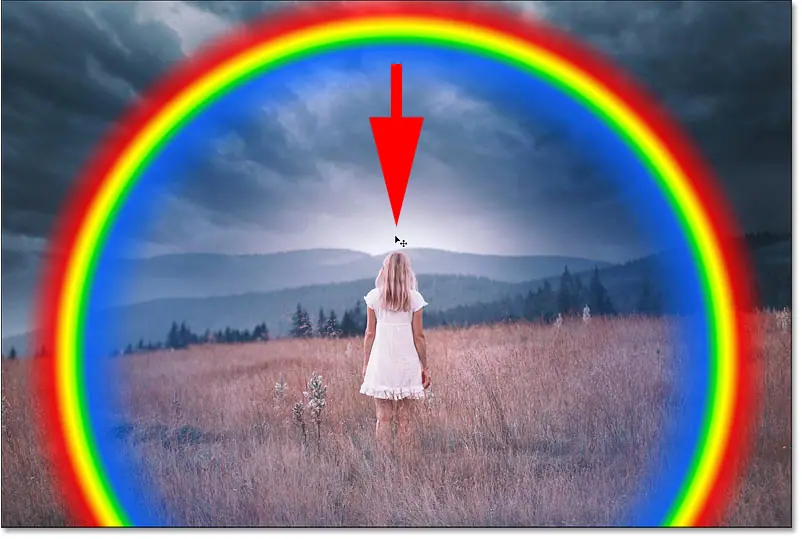
Drag the rainbow into place.
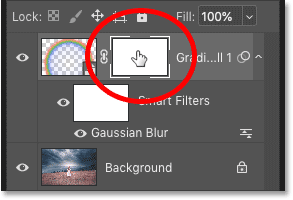
Step 10: Convert the Gradient Fill Layer to a Smart Object
In a moment, we'll help the rainbow look more realistic by applying a blur to the gradient. But Photoshop won't let us apply the blur directly to a gradient fill layer. First, we'll convert the fill layer into a Smart Object.
in Layers panel , make sure that the Gradient Fill layer is selected. Then click menu icon Top right of the painting:
![]()
Clicking the Layers panel menu icon.
And choose Convert to a smart object From the list:
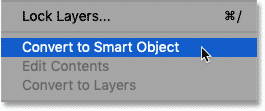
Choose the “Convert to Smart Object” command.
A Smart object icon A thumbnail preview appears at the bottom right of the layer, telling us that the layer is now a Smart Object:
![]()
Smart object icon.
Step 11: Change the blending mode of the gradient to Screen
Before applying the blur, change the blend mode for smart object from normal to Monitor :
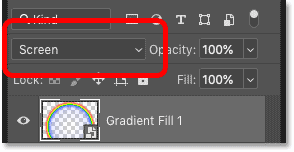
Change the blending mode to screen.
Screen blend mode lightens the gradient and blends the colors with the image:
The result after changing the gradient blend mode to Screen.
Step 12: Apply the Gaussian Blur filter
Next, go to List Filter In the menu bar at the top of the screen, select Blur , then choose Gaussian blur :
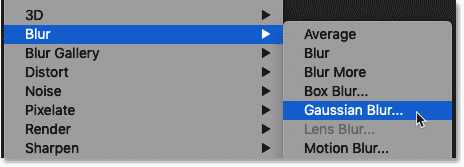
Go to Filter > Blur > Gaussian Blur.
Then in the Gaussian Blur dialog, drag a slider Radius Right to blur the gradient and smooth transitions between colors. The exact Radius value you need will depend on the size of your image, so watch your image as you drag the slider to find the best value.
My image is rather large, so I'll choose a radius value of around 100 pixels:
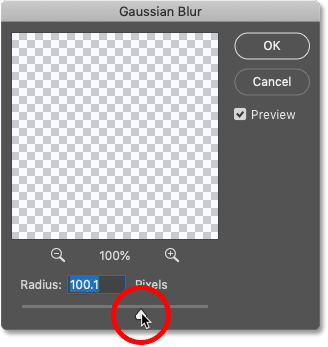
Drag the Radius slider to blur the gradient.
Click OK to close the dialog, and here is my result with the opacity applied:
The result after applying the Gaussian Blur filter.
How to change the amount of Gaussian Blur
Since we used the Gaussian Blur filter with a Smart Object, Photoshop applied it as a Smart Filter, which means that the filter settings remain editable.
At any time, you can reopen the Gaussian Blur dialog and adjust the Radius value by double-clicking the words Gaussian blur Below the Smart Object in the Layers panel:
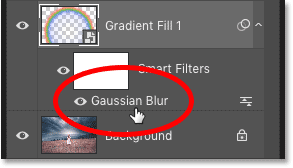
Double-click a smart filter to modify the settings.
Step 13: Add a Layer Mask
An obvious problem with a rainbow is that it is still a full circle. We need to hide the bottom half of the gradient, and we can do that with a Layer Mask.
In the Layers panel, click the icon Add LayerMask :
Clicking the Add Layer Mask icon.
A layer mask thumbnail Shown on the Gradient Smart Object:
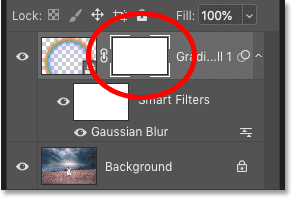
Layer mask thumbnail.
Step 14: Select the Gradient Tool
Locate gradient tool From the Photoshop toolbar:
Choose the gradient tool.
Step 15: Choose the Black and White Gradient
Then in the options bar, click Arrow next to color swatch pheasant :
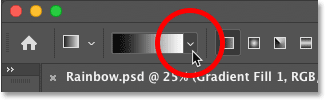
Click the arrow to the right of the sample.
وفي Gradient picker , open a folder The basics and choose Gradient black and white By double-clicking on its thumbnail. This will select the gradient and close the gradient picker:
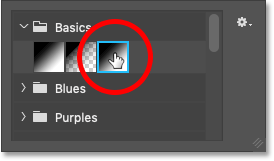
Choose a black and white gradient.
Step 16: Draw a black to white gradient on the layer mask
In the Layers panel, make sure the Layer Mask is selected. You should see a distinct border around its thumbnail:
Choose a layer mask.
Then in your image, click anywhere along the horizon line to set the starting point for your rainbow. If there is no clear horizontal line, click where the left and right sides of the rainbow should begin to appear. Everything below this point is where the rainbow will disappear.
With my picture, I'm going to click trees over tall grass.
Hold down the mouse button, and hold down a key Shift On the keyboard, swipe straight up below the top of the rainbow. The Shift key makes it easier to drag vertically:
Paint a black to white gradient on the layer mask to hide the lower part of the rainbow.
Release the mouse button and the lower part of the rainbow will disappear, leaving only the upper half which gradually fades as it rises into the sky.
If you didn't draw the gradient from black to white completely, just draw it again. The new gradient will replace the previous one:
Only the upper half of the rainbow remains visible.
Related: Learn advanced tips and tricks for using them with Layer Masks!
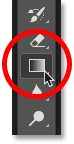
Step 17: Select the Brush Tool
Once you've hidden the bottom of the rainbow, there may be other, smaller areas you need to mask.
For example, with my picture, the bottom right of the rainbow is visible in front of the hill. But what I really want is for the rainbow to disappear behind hill:
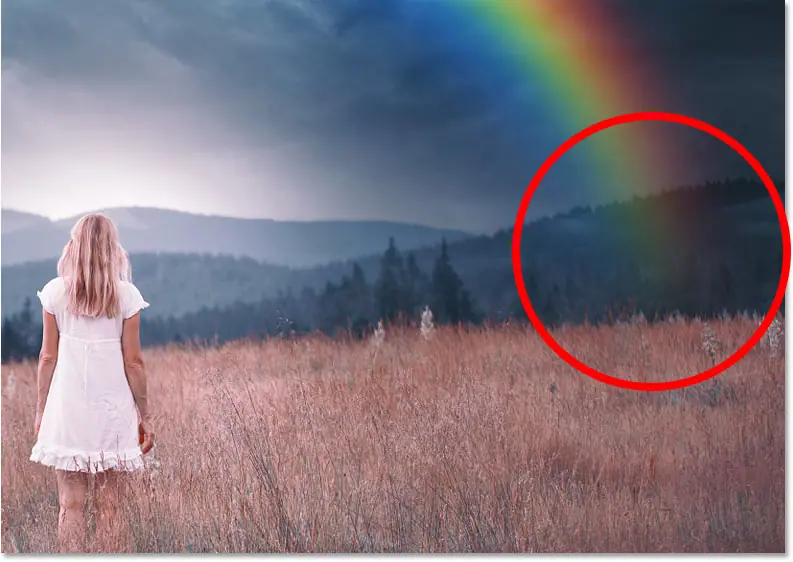
Part of the rainbow still needs to be hidden.
To hide such areas, select Brush Tool From the toolbar:
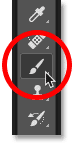
Choose the brush tool.
Step 18: Choose a Soft Round Brush
With the Brush Tool selected, Right click (Win) / Control-click (Mac) anywhere within the image.
then in Brush Preset chooser , choose a brush Soft round from within a folder General brushes . This will give us a brush with soft edges, allowing us to paint a smooth transition:
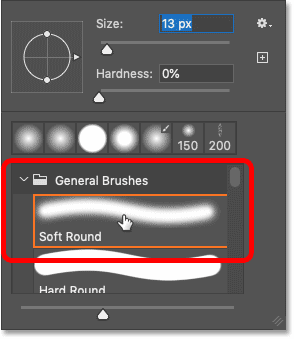
Choose a Soft Round brush.
Step 19: Paint with black to hide more areas of the rainbow
Make sure to set foreground color on the black . The current foreground and background colors are found in color samples near the bottom of the toolbar.
If the foreground color (top left) is white and the background color (lower right) is black, tap on the letter X on the keyboard to switch them:
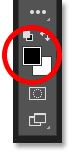
Set the foreground color to black.
Before you start drawing, change the brush size with Left and right bracket keys ( [ و ] ) on the keyboard. The right bracket key makes the brush larger while the left bracket key makes it smaller. The larger the brush, the wider the transition area you will create.
Then simply paint over the part of the rainbow that you want to hide. Or you may find that just clicking the area a few times works better. If you make a mistake, press Ctrl + Z (Win) / Command + Z (Mac) on the keyboard to undo the stroke and try again.
Here I am painting over the hill to hide the rainbow from that spot:
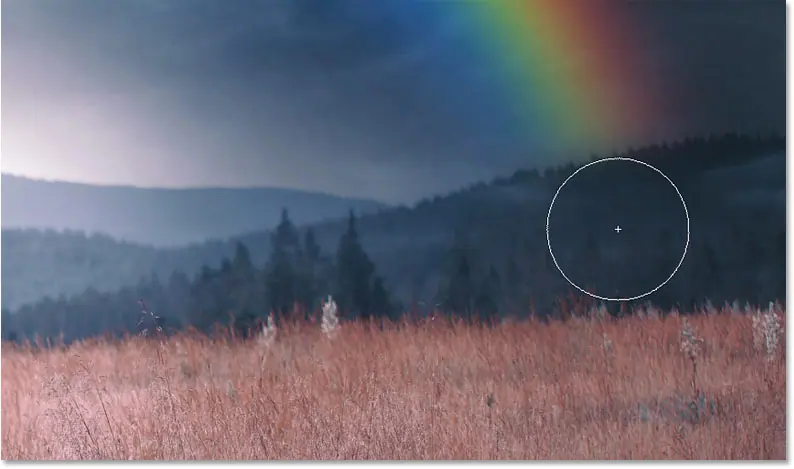
Paint to hide the rainbow in front of the hill.
Here's the result:
The result after hiding more rainbows.
Step 20: Open Blending Options
At this point, the main rainbow effect is complete. But we can take it a step further by blending rainbows into clouds. And for that, we'll be using Photoshop's blending options.
In the Layers panel, click an icon Add Layer Style (Code " fx "):
![]()
Clicking the Add Layer Style icon.
And choose Blending Options From the list:
Open blending options.
Step 21: Drag the black Underlying Layer slider to the right
In the Layer Style dialog box, you will find two sets of sliders at the bottom, each with a black to white gradient. The top group is called "this layer" and the bottom group is called the "base layer".
Click Black slider for group Bottom layer and start On dragging it to the right:
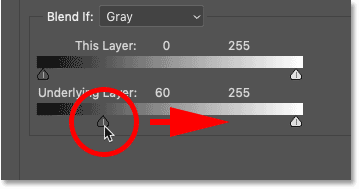
Drag the black "Basic Layer" slider.
Watch your image drag and stop as the dark clouds from the image begin to appear across the rainbow:
Dark clouds appear through the rainbow.
The problem is that the transition between clouds and rainbows is very difficult. To fix this, press and hold a key Alt (Win) / Option (Mac) on the keyboard and drag the black slider apart in half. The space between each half creates a transitional area between the clouds and the rainbow.
Adjust each half of the slider until the result looks more realistic:
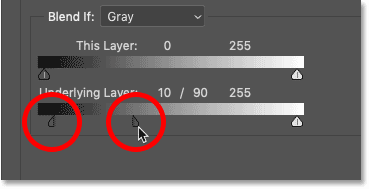
Drag each half of the slider to create smoother transitions.
When done, click OK to close the Layer Style dialog box.
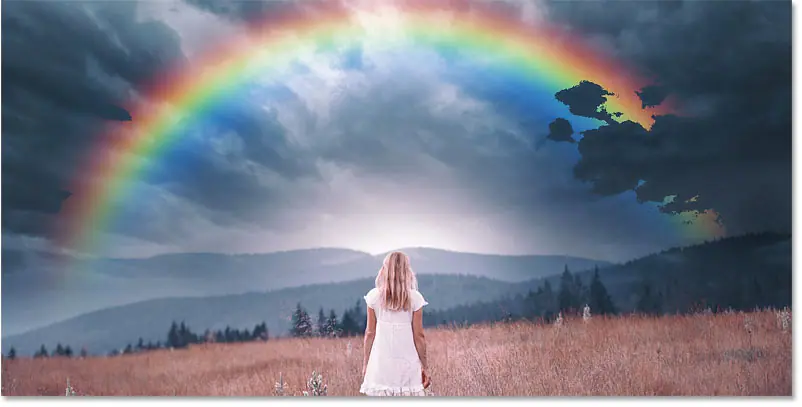
And here's the final rainbow effect with clouds and a rainbow mixed together:
The ultimate rainbow effect.


