
The receiver
Receivers designated for free channels (in English: Free to air receivers) are devices designed to receive unencrypted television and radio channel signals, which are available to everyone for free without the need for a subscription. The receiver receives the signal of a specific channel and then decompresses it if necessary, but most high-quality channels do not depend on signal compression.
The receiver device requires a satellite dish, as the dish picks up the unencrypted signal from the satellite, and this signal is usually compressed in MPEG-2 format. If the user wants to receive signals from more than one satellite, he must use a motor for his satellite dish.
Most free channels do not require a specific type of receiver, but they do require that the device supports the video compression format used, the most famous of which is MPEG-2. Television channels transmit their signals to satellites orbiting the Earth in the form of radio waves, and when these satellites receive the signals, they rebroadcast them towards the Earth, and then the satellite dishes pick them up and send them to the LNB device located in the middle of the dish, and then the signal is strengthened and sent to a device. The receiver.
Add channel frequency
Install the receiver
To benefit from the receiver to watch TV channels, you must first install the satellite dish and then program the receiver. This is done by following the following steps:
Read also:The difference between programming languages- Choosing the appropriate location for the satellite dish. The dish is usually installed on the roofs of buildings or on balconies. The satellite dish must be directed to the satellite whose channels you want to benefit from, and a compass can be used to facilitate choosing the appropriate angle.
- After finding the appropriate place for the plate, it is firmly fixed so that it is resistant to the force of the wind, in order to avoid it falling and causing material damage or harming passers-by.
- Changing the direction of the dish so that it is directed at the same angle as the satellite to be received, raising it slightly upwards, and then tightening the screws that fix the direction of the dish, but it is not yet fully installed.
- One of the devices designated for searching for satellites can be used to ensure that the dish is placed in the correct direction. This device is connected to the dish using a coaxial wire, and then the name of the moon and its frequency are determined. After that, the direction of the dish is changed until a ringing sound is heard from the device. Therefore, the screws that secure the direction of the plate are fully installed.
- The horizontal angle of the dish is determined in the same way as used to determine its direction, choosing the angle with the best signal and highest quality.
- Passing a coaxial cable from the dish to the receiver, and during that time making sure that the wire is well fixed on the edges of the roof of the building or the sip, in order to avoid risks that may result from it being loose, or simply to avoid damage to it.
- Drill a hole in the wall to pass the coaxial wire through, making sure that the wall does not contain electrical wires or water pipes behind it.
- Connecting the coaxial wire to the receiver.
Configure the receiver
After completing the installation of the dish and connecting it to the receiver, the receiver is turned on in addition to the television set connected to it. Something should appear on the TV screen indicating that the receiver is preparing itself to work for the first time. After this is completed, it is possible to proceed with identifying the satellite and installing channels. New.
Read also:How to make a remote controlInstalling channels on the receiver
To choose a satellite and install its channels on the receiver, the following steps are followed:
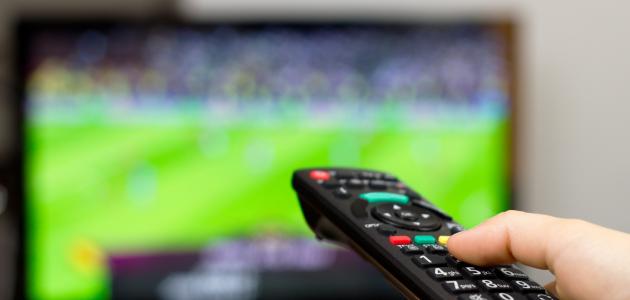
- Press the Menu button on the remote control and then go to Settings.
- Choose the option to select the satellite (in English: Select satellite), and thus a list of the names of all the satellites identified on the device will appear. The up and down arrow buttons are used to navigate the list and choose the desired satellite, after which the “OK” button is pressed to select it.
- Press the yellow button on the remote control to start the channel search process. A bar will appear showing the status of the process. When the bar is complete and reaches the value of 100%, the process will be complete and it will stop searching for channels automatically, and the first channel found will be displayed. On TV.
- The up and down arrow buttons “Ch Up” and “Ch Down” are used to move between the available channels.
Reset the receiver
The user of the receiver may have to reset his device in the event of a malfunction, such as a malfunction in its software, a power outage, or something else. The process is as follows:
Read also:Research on computer programming- Make sure that channel 3 or 4 on your TV is selected.
- Ensure that all connections of the receiver are connected correctly and are not loose.
- If there is a decryption card (in English: Key card), it is removed from the receiver slowly, and then re-inserted after at least 30 seconds.
- Disconnect the power supply cord from the receiver, and then reconnect it again after at least 30 seconds.
- Press the power button on the front of the receiver to start it, wait a few minutes until the signal is picked up again, and reinstall any updates, if any. Thus, the process of resetting the receiver has been completed.


