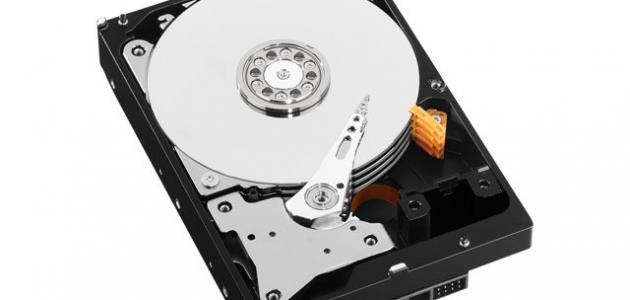


The hard disk is considered one of the basic components of any computer device, as it is the storage space on which data is stored, and it is a device that consists of a group of magnetic disks that rotate, and the data is read from it through an electromagnetic pickup, where it is written on the disks and read from them, and these disks have types:
- SCSI.
- IDE
- SATA.
The hard disk stores data in the form of zero and one, which is the language of bytes in computers, so that the magnetic catcher searches for an empty space in the hard disk and then writes on it, so the data on the hard disk is distributed and does not deal with it or understand it as one block of data. A Word file, for example, divides this file into bytes, and each byte is stored in a single storage space that may be connected behind each other, and may be separate and dispersed, and this is the most likely possibility, so when dividing the hard, this area must be taken into account to make the hard disk, especially if we want to re-merge and divide The hard disk of a device that contains previously stored data.
How to divide the hard disk: There are several ways to partition, including what is divided during or after formatting the device and downloading a new Windows, including what is done after all the disks are merged and completely formatted by what is known as DM, which is an abbreviation for Disk Manger.
Read also:Device acceleration commandsWhen evaluating the hard disk, the storage space needed by Windows must be taken into account, and there must be a special disk for it, and accordingly the disks are divided into two types, namely Primary and Logical, where the operating system is in the basic disk and takes a storage space of 50 to 60 GB, while the rest of the logical disks are for the user Partition with the space he wants for each disk.
To make a hard partition without special programs, we follow the following steps:
- We go to the computer icon on the desktop (in Windows) or to (This PC) in Windows 8 from browsing files, then right-clicking on it and choosing the Manage option.
- A screen will appear containing all the settings and management options for the device, from which we choose Disk Manage, which is at the bottom of the options on the side of the screen.
- After selecting Disk Management, it will start downloading the disk data and several colors will appear for the disks, which are as follows: If the color is black, it means that the space is not partitioned, and the dark blue color means that the disk is basic and contains the operating system, and the green color is the extension disk and contains the remaining space of the disk. The main disk, and finally the light blue disk, which is the logical disk space, is created from the available space.
- We go to the black part, right-click on it, choose new Partition or new Simple Volume, after which a window will appear with steps to follow.
- After we pressed Next, we choose the primary disk, then Next, then we specify the space of this disk at the rate of the space given.
- Then a screen will appear for you to choose the name of the disk, after that comes the encoding screen for the disk. We choose FAT32, the default unit size, then Next.
- A screen will appear with a summary of the previous options that we chose, click Finish.
- The device will load for a while until the new disk comes out, and the method can be repeated with all the spaces that appear in black to be divided.


