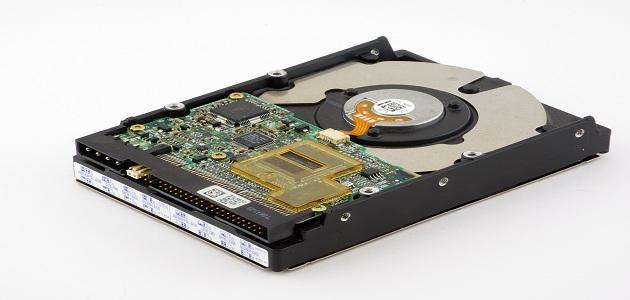

Partition the hard disk
The computer user resorts to partitioning his hard disk, and this may be for several reasons. The main goal of creating a partition is to make a specific area of the hard disk available to the operating system, so the user creates what is known as a partition. Which can be considered as a part that takes up space on the hard disk.
Another benefit of dividing a hard disk is using these partitions to install several operating systems on the same hard disk at the same time. Each operating system requires its own partition to be able to work. The hard disk can also be divided to facilitate the organization of files on it (such as separating important personal files from others). of files), in addition to preserving them and protecting them from loss. When you partition a hard disk, it is formatted and a file system is installed in it so that it becomes ready to store files.
A file system is the way files are stored and named so that they can be retrieved at any time. Most operating systems use file systems in which files are stored in a tree-like structure. Files are contained in what are known as folders. File systems can also provide other features, such as specifying which users can read from or modify a particular file, in addition to the ability to encrypt files so that they cannot be decrypted. This encryption can only be used by someone who has the secret code designated to decode it, etc.
Read also:The largest photo siteHow to partition a hard disk
Using Disk Management software
Users of the Windows operating system (in English: Windows) can resort to using the “Disk Management” software found in all versions of Windows, which allows the possibility of dividing the hard disk, and this is done as follows:
- If the version of Windows used is version 7 or later, click the “Start” button, then right-click on “Computer”, then choose “Manage”, then choose “Disk Management” from the “Storage” section. In the “Computer Management” window. In Windows 8 and Windows 10, right-click on the Windows button to open the “Power User” menu, and then choose “Disk Management.”
- The user will be asked about the type of partitioning he would like to adopt for the new hard disk that the user wishes to partition. He will choose “GPT” if the hard disk has a capacity of 2 terabytes or more. Otherwise, he will choose “MBR,” and then the button will be pressed. “OK”.
- Select the hard disk you want to partition from the bottom of the “Disk Management” program window.
- Click the right mouse button on the part for which you want to create a partition, so that the phrase “Unallocated” is written on this part, and then “New Simple Volume” is selected, after which the “Next” button is pressed.
- Specify the capacity of the new partition in megabytes in the “Simple volume size” box, and then press the “Next” button.
- Choose the letter that will be used to refer to the new section, and then press the “Next” button.
- Choose “Format this volume,” and then choose the file system you want to use. The “NTFS” system is used if the hard disk will be used in Windows operating systems, but if it is desired to be used in the Mac operating system, “exFAT” is chosen.
- Choose a name for the section in the “Volume label” box.
- Do not activate the “Perform quick format” and “Enable file or folder compression” options.
- Click on the “Next” button and then click on “Finish” to complete the process.
Existing partitions can also be formatted using “Disk Management” software; By clicking on it with the right button of the mouse, then choosing “Format” and following the previous steps starting from step 8.
Read also:How to number pages in WordUsing DiskPart software
Users of the Windows operating system can benefit from the “DiskPart” program to partition the hard disk, but before that it is preferable to make a backup copy of the files to avoid losing them in the event of errors. It is also advised to be very careful when using this program. A new partition can be created on the hard disk as follows:
- Through the command prompt (in English: Command Prompt), the command “Diskpart.exe” is typed to run the program.
- View the hard disks installed in the computer through the “LIST DISK” command, and then select the disk to be partitioned through the “Select Disk” command followed by the disk number.
- Enter the command “=CREATE PARTITION PRIMARY SIZE” followed by the desired size of the partition in MB.
- Enter the command “=ALIGN LETTER” followed by the letter you want to refer to the partition; Provided that the letter is not used by another department.
- Enter the “Exit” command to exit the program.
To increase the capacity of a specific partition, first check the available capacity of the hard disk, and then follow the following steps:
- Run the program by typing “Diskpart.exe” at the command prompt.
- Select the desired hard disk through the “Select Disk” command followed by the hard disk number.
- Select the partition whose capacity you want to increase through the “Select Volume” command followed by the partition number.
- Enter the command “=Extend Size” followed by the capacity you want to add to the partition, which is in megabytes.
- Enter the “Exit” command to exit the program.
To delete a specific partition on the hard disk, follow these steps:
Read also:How to identify the printer- Type “Diskpart.exe” at the command prompt to run the program.
- Select the desired hard disk through the “Select Disk” command followed by the hard disk number.
- Select the partition whose capacity you want to increase through the “Select Partition” command followed by the partition number.
- Enter the “DELETE Partition” command.
- Enter the “Exit” command to exit.


